|
|
|
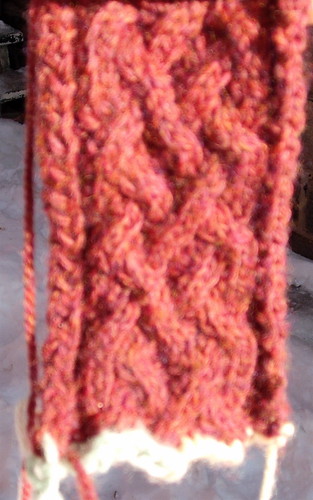
So, the brim to this hat is done; 60 cm of dense cabling. That led me to a technique that I knew I was going to have to use. Namely, grafting.
Knowing that, I turned to Google, which gave me the helpful entry on nonaKnits blog However, there was a catch: that and every tutorial I could find that made sense to me wanted to talk about stockingette. My fabric is p4, k6, p2, k6, p2, k2.
So I thought a bit. Then I forged ahead, full of hubris. And, to be blunt, I fucked up. After the fact, it occured to me that, on a project that, to date, has had six test swatches knit to get the cable patterns right, I could have spared the ten minutes to knit two pieces of stockingette-plus-ribbing to screw around with. Especially since I know better than to carry out experiments in a production environment.
That said, I learned a lot from my mistakes:
- Always, always, always swatch.
- Kitchener stitch has four actions for each stitch.
- If the yarn goes to the middle, that's a knit. If it goes to the outside, that's a purl.
- It's easiest to start on a knit stitch.
- Grafted stitches are nearly impossible to pull out.
- Always swatch, you fool.
So, that said, I now see the geometry of the two basic stitches and I'm writing it down so that next time, I don't dig myself a hole.
To start, have all stitches live and on two needles with the tips facing left as you hold them in front of you. Have a tail of yarn at least 3 times the length of the edges that you're about to graft together.
If the right side starts with a purl stitch, turn the work inside out, so that you're starting on a wrong side knit stitch.
Knit Stitch
- Pass the yarn knitwise through the first stitch on the needle nearest you. Since it is going toward the middle, it's a knit stitch.
Drop the stitch off the needle.
- Pass the yarn purlwise through the next stitch on the needle nearest you.
Leave this stitch on the needle.
- Pass the yarn purlwise through the first stitch on the farther needle. Since it is again going toward the middle, it's a knit stitch.
Drop the stitch off the needle.
- Finally, pass the yarn knitwise through the next stitch on the farther needle.
Leave this stitch on the needle.
Repeat those four steps for every knit stitch, even if the next is a purl. I count them in my head as 'in, out, in, out'
Purl Stitch
Unsurprisingly, the purl is simply the inverse of the knit.
- Pass the yarn purlwise through the first stitch on the needle nearest you. Since it is going away from the middle, it's a purl stitch.
Drop the stitch off the needle.
- Pass the yarn knitwise through the next stitch on the needle nearest you.
Leave this stitch on the needle.
- Pass the yarn knitwise through the first stitch on the farther needle. Since it is again going toward the outside, it's a knit stitch.
Drop the stitch off the needle.
- Finally, pass the yarn purlwise through the next stitch on the farther needle.
Leave this stitch on the needle.

In the case of this hat, I'm going to suck it up, live with my mistakes and carry on. Fortunately, the next step in this project is far less arduous: picking up one stitch per row of ribbing from a knit selvedge.
 I'm knitting, flat, the brim of a hat which will eventually be joined together and picked up. This is the chart that I'm following, a paired three-strand braid. The left side will be picked up and be knitted with a further knotwork pattern. The right side will be folded over and sewn together, to make a rolled border.


I've just finished knitting this hat, with a cable pattern of stylised trees. The trees themselves are based on a binary tree structure, but have twists and knots around themselves and around other branches. The way the branches converge into a cluster reminded me of groves of dogwood, hence the name.
The trunk expands (via a pair of decreases and increases), then splits into two branches. These branches twine once around themselves then split again, the four split branches twining before dividing yet again into a meshwork of twisting branches that stretch to the top of the hat.

 Here is the travelling cable hat after I got done adding eight rounds of k2p2 rib to it. It's warmer, especially around the ears.
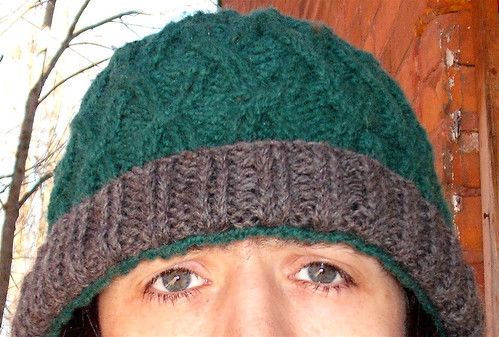
I've worn the Joy of Cables Hat for a few days now, and am finding that my fear of running out of yarn made for a hat that was a little too shallow. It just covers my ears and does so loosely.
Fortunately, I have plenty of yarn in other colours, so I'm going to extend the hat by 5cm or so. The edge is a simple k2p2 rib, so what I'll do is pick up stitches, purl one row to give the hat a line where it'll fold easily, then knit a brim in the same rib.
Because I'm trying to tighten the hat a bit as well, I'll keep the rib the same. Were it already a snug fit, I'd increase on rows 4 and 8, in the purl part of the ribbing.
The hat was knit on 5mm needles, so I'll pick up with much smaller needles. The closest smallercircular needles at hand were 3.5mm, so I'm using those. Picking up stitches is a simple enough prospect: there's a hole just right of each stitch, so I insert a needle under both threads of the cast on, insert the point of my circular needle and knit a stitch. Then I repeat that 120 times, one per stitch.
After that, I'll knit from the 3.5mm needles onto 6mm ones, as that was the size used for the hat.

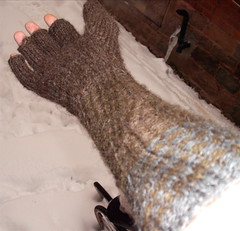
I have knit the right sleeve now. To fit my arm, it took a total of 68 rounds on 5mm DPNs. As well, to work the increases that were necessary to making the sleeve taper outward, I chose a style of increase that fit the pattern.
- Starting at the beginning of a rib, k3, p1, purl the front of the next stitch then knit the back (pfb). (6 stitches)
- k1, s1, k1, p3
- k2, p1, knit the front loop, then the back, of the next stitch (kfb), p1 (7 stitches)
- k1, s1, k1, p1, k2, p1
- k3, pfb, k2, pfb (9 stitches)
- k1, s1, k1, p2, k2, p2
- k3, p2, k1, kfb, p2 (10 stitches)
- k1, s1, k1, p2, k1, s1, k1, p2
- k3, p2, k3, p2
At this point, another rib has been added, appearing as a line of knit stitches in the middle of a column of purl stitches.
I did this twice, once after knitting 30 rounds and again after knitting 50. This allowed me to keep the glove tight around the wrist, flaring slightly as it approached my elbow.
Because I like the zigzag that the ribbing pattern gives, I alternated green and brown yarns for the majority of it, ending the upper sleeve with a change to green and grey for ten rounds each.

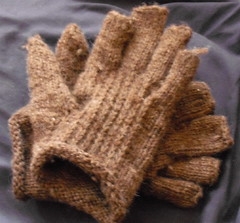
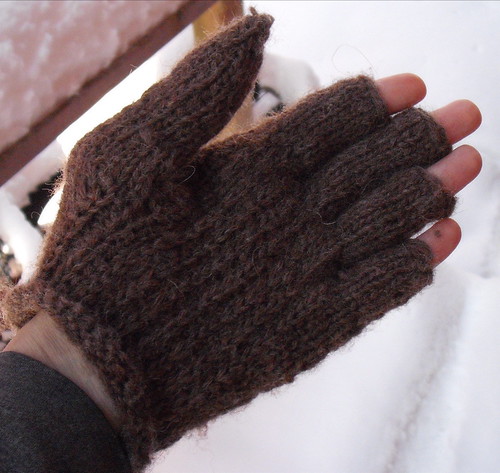
I've now knitted one pair of Janis Cortese's Broad Street Mittens in worsted yarn. They fit nicely, but, unfortunately, only come to my wrist as I've not yet started knitting the cuff/sleeve.
I want the sleeve to be at least 30 cm, so left it out of knitting the mittens until I saw how they turned out. Though, I suppose that I could have started with the sleeve and converted it into arm warmers after the fact.
I know that the current cuff of the mittens is 40 stitches around. I also know that my wrist is tiny, so what I intend to do is reduce to 30 stitches around (I pulled the cuff of the glove tight and counted the number of stitches around my wrist) and then add 5 stitches halfway up my arm.
Why 5? Well, I've found myself knitting a lot of k2p2 rib recently, so want to do something different, especially seeing as it looks serviceable but ultimately uninteresting when worked in multiple colours. I have a nice olive drab yarn that I bought when I was first considering these mittens, and I'd like the sleeves to be striped.
With those two constraints in mind, I considered various ribbings and decided that I'd work the following pattern:
- knit 1, slip 1 purlwise with yarn in back, knit 1, purl 2 (repeat from start)
- knit 3, purl 2 (repeat from start)
That way, the slipped stitches break the monotony of simple circular stripes, forming a slight wave pattern with the purl stitches, while still providing the texture and stretchiness of ribbing.
The final consideration is what gauge to use. I'd considered knitting the sleeve on 3.75mm needles, but gradually decided that, since it's a layer that will be worn along with a shirt and coat, that I might be wise to use 5mm needles to get a looser fabric. That means that, rather than using 30 stitches as I'd intended, I'll need to use fewer.
My gauge on the gloves was 8 stitches / inch and my gauge on the 5mm needles with worsted yarn is 5 stitches/inch. From there, it's simple algebra to figure out how many I need:
desired stitches / 30 == 5 st/in / 8 st/in
desired stitches == ( 5 / 8 ) * 30
desired stitches = 18.75
Since the pattern I'm using for the ribbing is a repeat of 5 stitches, I round 18.75 to 20 and know that I need to decrease half the stitches to make it fit. In order to keep the glove from puffing out, I'm going to try picking up 40 stitches then decreasing ten of them the next row, knitting one row straight, then decreasing ten times on the next row.
If that doesn't work, I'll rip it out, pick up and knit a round with 3.75mm needles, decrease to 30 stitches and then knit onto the 5mm needles.
A note, though: to keep the fabric from stretching as I pick up, that will be done on 3.75mm needles and the second round will be knit onto the 5mm ones.

I'm currently knitting Janis Cortese's lovely Broad Street mittens, from the fall 2002 issue of Knitty. In looking over the pattern, I decided to make a few adjustments in the interest of warmth.
This is not a pattern so much as it is a list of modifications to the Broad Street pattern.
Firstly, the pattern is meant to be knit with small needles and fingering-weight wool. I decided that I wanted worsted wool, partly for warmth and partly because, when contemplating the pattern, I bought two balls of worsted in preparation.
In what could be considered a moderately silly gauge swatch, I knit the palm, following the pattern. Then, comparing the half-glove hat I had to the size of my hand, I worked out that it was about 50% too big.
I cast on again, starting from the wrist as before. This time, knowing the difference in size, I used 40 stitches of worsted weight on 3.75 mm needles, for a tight, dense fabric. The reason for starting at the wrist rather than the cuff is that I'm planning to knit elbow-length sleeves onto the gloves, so will pick up around the wrist and knit until I'm satisfied.
I knit two rows before getting to my second change: rather than knitting the palm in stockingette, I want it to be a thicker, denser fabric. A quick browse of Barbara Walker's Treasury of Knitting Patterns gave me k1s1 rib, or heel stitch.
Thus the pattern for the palm became:
- knit the whole round
- knit the whole round
- k2, *k1, slip one stitch purlwise with the yarn in back, repeat from * until the second-last stitch on the second needle. p1, knit the last stith front and back. Knit the rest of the round.
- knit the whole round
- k2, *k1, sl1 wyib, repeat from * until reaching the purled stitch. p1, kfb. Knit the rest of the round.
- knit the whole round.
I repeated steps 5 and 6 until I'd added eight stitches, set those stitches aside and cast on nine stitches on the next row.
For the thumb gusset decrease, I used the SSK/k2tog decrease until I again had ten stitches on the second needle.
To finish the palm, I knit 12 rows with heel stitch on the palm, stockingette on the back. The glove is longer lengthwise because the heel stitch used makes a far denser fabric vertically. Also, my hands are very long. Following the pattern, 8 rows would be more accurate.
Pinky finger was 4 from the palm, 5 from the back, plus one cast-on stitch.
Extending the palm, I picked up 3 stitches from the pinky, rather than 2, to ensure no holes. Knit 8 rounds, heel stitch on the front, stst on the back.
The other fingers were 12 stitches, 16 stitches and 16 stitches, using 3 stitches picked up from the finger beside them each time.
For the thumb, I picked up 12 stitches from the cast-on stitches and immediately decreased from 22 to 18, at a rate of two decreases every other row. The thumb was finished in the same way as described in the pattern.

This is a pattern for a hat that just popped into my head. I thought it would be neat to use cables in a spiral pattern, so that half the cables turned right and the other half turned left. As I was knitting it, I added a few more things, like the cables being woven into an over/under/over basketweave.
The hat is surprisingly soft and warm (I knit it from heavy worsted weight wool) and, because it is, in essence, a k2 p2 rib all the way around, it has a good amount of give to it.
The pattern has cabling on three rounds of every eight, but it repeats often enough that it's elatively simple to keep in your head.
Requirements:
- Double-pointed needles (I used 5mm DPNs)
- Optionally circular needles in the same gauge.
- 100 to 150 metres of worsted weight yarn.
I knit the hat with a gauge of 2 stitches / cm in k2p2 rib and 5 rounds / 2 cm, but the pattern adapts easily to different sizes by adding or removing repeats both around and vertically.
Cast on enough stitches on circular or double-pointed needles to go loosely around the head, with the number of stitches being a multiple of 8. The pattern repeats are 8 stitches long, with two cables being worked every 8 stitches.
Join in the round, then knit 2, purl 2 and mark that point as the start of your round. The pattern from here on will be expressed as a set of eight stitches. Repeat that as many times as needed to finish the round.
| Rows 1-12 | k2, p2, k2, p2 |
| Row 13 | Cable 2 left (c2l: Place two stitches on a cable needle or double-pointed needle, hold them in front of the work. Purl the third stitch then knit the two stitches off the cable needle.), cable 2 right (c2r: Place one stitch on another needle, holding it to the back of the work. Knit the next two then purl the stitch off of the cable needle), p2 |
| Row 14 | p1, cable 2x2 right (c2x2r: Place two stitches on a cable needle, holding it to the back of the work. Knit the next two then knit the stitches off of the cable needle), p3 |
| Row 15 | p1, k4, p3 |
| Row 16 | C2r, c2l, p2 |
At this point, every pair of cables has moved toward each other and crossed over, with the left cable going over the right.
| Rows 17-19 | k2, p2, k2, p2 |
| Row 20 | k2, p2, k2, p2 |
| Stop this round four stitches before the end and mark this point. There should be one column of ribbing left. For the next four rounds, this is the new beginning of the round. |
| Row 21 | c2l, c2r, p2 |
| Row 22 | p1, cable 2x2 left (c2x2l: Place two stitches on a cable needle, holding it to the front of the work. Knit the next two then knit the stitches off of the cable needle.), p3 |
| Row 23 | p1, k4, p3 |
| Row 24 | c2r, c2l, p2 |
| Row 25 | k2, p2, k2, p2 |
| At the end of this round, move the beginning of the round forward four stitches, so that it's back to where it was originally. |
| Rows 26-28 | k2, p2, k2, p2 |
| Row 29 | c2l, c2r, p2 |
| Row 30 | p1, c2x2r, p3 |
| Row 31 | p1, k4, p3 |
| Row 32 | c2r, c2l, p2 |
| Rows 33-35 | k2, p2, k2, p2 |
| Row 36 | k2, p2, k2, p2, marking 4 stitches before the end as the new beginning of the round. |
| Row 37 | c2l, c2r, p2 |
| Row 38 | p1, c2x2l, p3 |
This is where I chose to begin decreasing. If you want a deeper hat, continue the pattern, knitting rows 23-38 until the hat is as long as you want it and stopping on a row where you are either cabling 2x2 left or cabling 2x2 right.
For the decrease rows, the pattern repeats quicker and quicker as you go because the pattern is decreasing in size with every row. Row 1 repeats every 8 stitches, row 2 every 6, row 3 every 5, etc.
If you are using circular needles, when the hat becomes too tight on them, switch to double-pointed needles in the same size.
| Decrease row 1 | Slip slip knit (ssk: slip two stitches, inserting the right needle as if to knit them. Insert the left needle into the front loops of the slipped stitches, wrap the yarn around the right needle and draw it through the loops), knit two together (k2tog: insert the right needle through the front loops of the first two stitches on the left needle. Knit these stitches as if they were a single stitch), p4 |
| Decrease row 2 | SSK, p4 |
| Decrease row 3 | SSK, p3 |
| Decrease row 4 | SSK, p2 |
| Decrease row 5 | SSK, p1 |
| Decrease row 6 | SSK |
Repeat row 6 until you have fewer than ten stitches on your needles. Take the yarn and pull it through all of the remaining stitches before sliding them off the needle. Pull the yarn inside the hat and tug it tight.
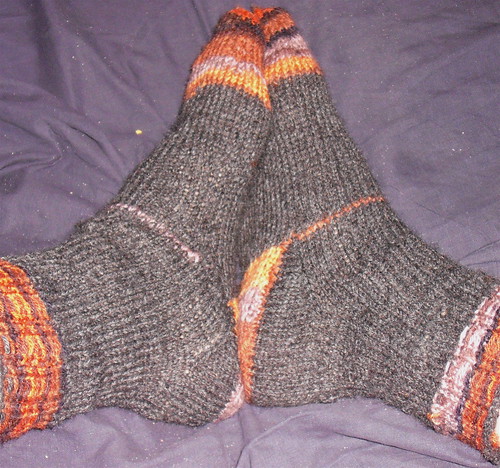
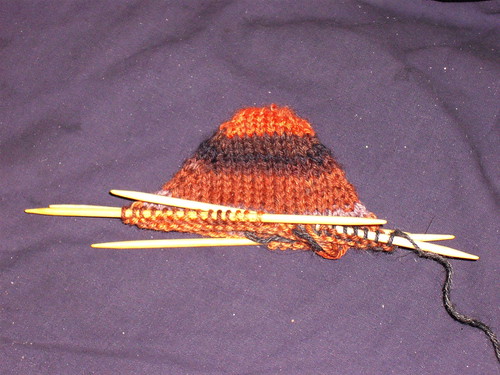
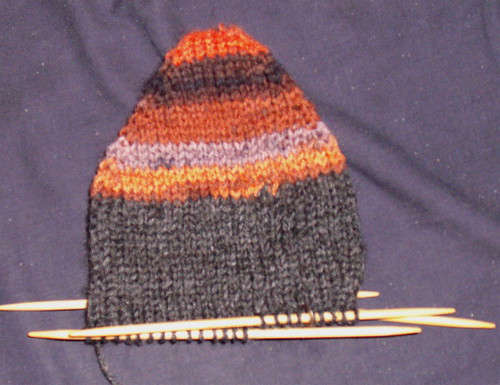
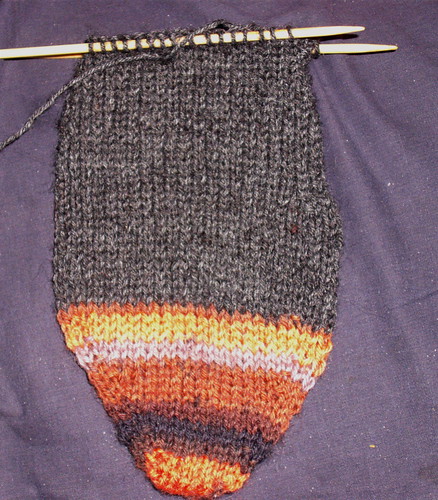
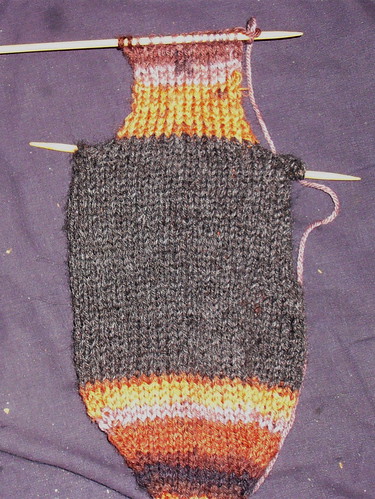
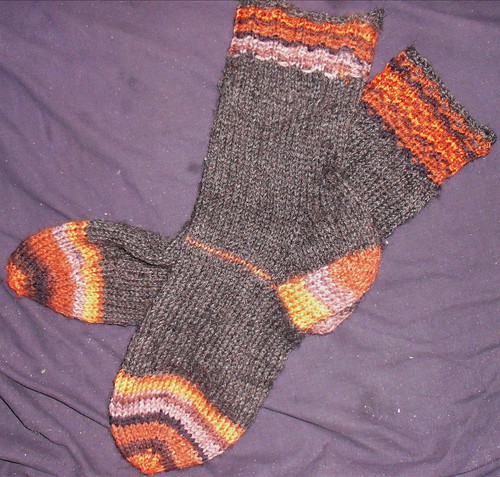
This is a pattern for toe-up socks. I amended several sock patterns and blended them together after finding that none of the patterns that I found on the internet fit my foot exactly.

These socks are fitted, so knowing your gauge with the needles and yarn that you'll be using is a must. As well, you'll need to know the length of the foot, the circumference around the ball of the foot, the circumference around the instep and the circumference around the ankle.
Casting on
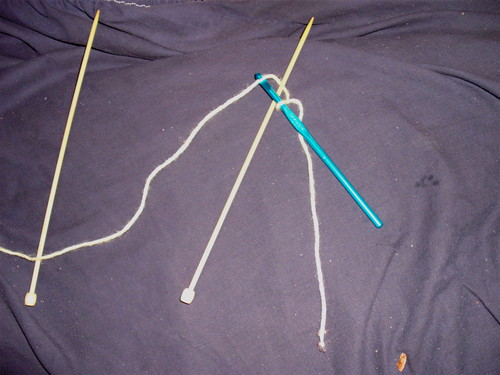
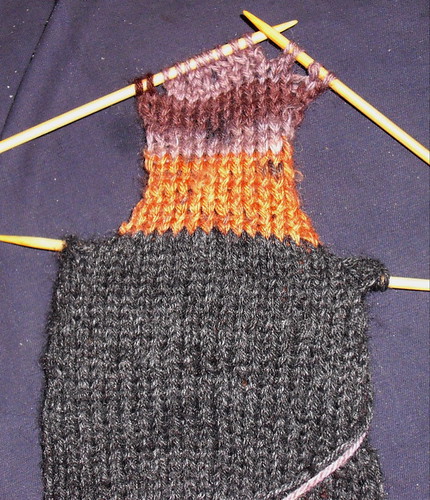
The sock starts with a provisional cast on. The way that I find easiest is to crochet a chain around a needle, that way it incorporates both the crochet chain and picking up the stitches into a single step. The toe is an adaptation of a pattern in Knitty.

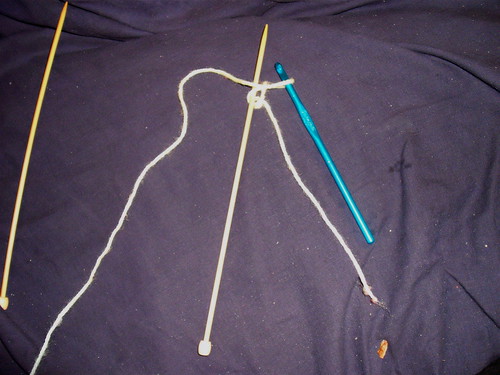
Using scrap yarn, start by tying a slip knot around a crochet hook. Then, wrapping the yarn behind a knitting needle, draw the yarn through the loop on the crochet hook, making a stitch.

You should have one loop on the crochet hook and one stitch below it, with the yarn wrapped around your knitting needle.

Repeat this process until you have at least eight stitches wrapped around the needle, then continue crocheting a chain without wrapping the yarn around the needle. This tail is useful to show what side you'll pull on to unzip the chain later on. (Video of crocheting a provisional cast on)

Next, with your working yarn, knit eight of the stitches on the needle, then continue working in stockingette until you have four rows, two knit and two purl.

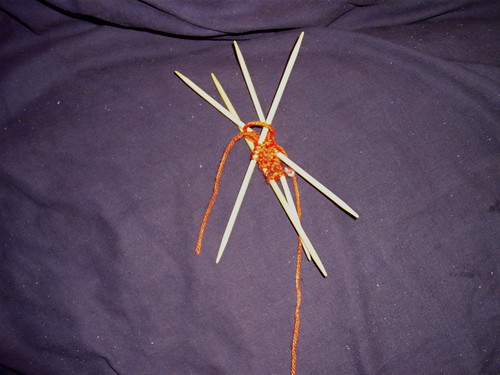
Separate the eight live stitches onto two double-pointed needles, then pull on the tail of the crochet chain to unfasten it, picking up the stitches of working yarn onto another two needles.
Knitting the toe
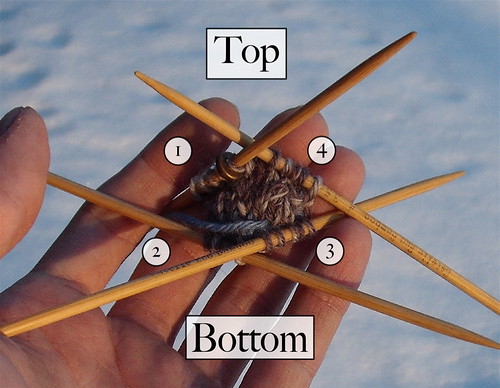
The first two needles are the top of the foot and the second two are the bottom. Knit the first four stitches, mark the second needle (it will be the start of the round, or needle 1) and continue knitting in the round until you're back to the first needle.

I like having the tip of the sock sit over my big toe, so I work the increases in a way that makes the toe lopsided. The pattern for this is:
Knit all but two stitches on needle 1, then knit the front and back (KFB) of the second-last stitch, inserting the right needle for a knit stitch, pulling a loop of yarn through, then inserting the right needle through the back loop of the same stitch, pulling a second loop of yarn through, then sliding the stitches off of the left needle.
Knit the last stitch on needle 1, the first stitch on needle 2, KFB the second stitch, then knit to the second-last stitch on needle 3. KFB that stitch, knit the last stitch on needle 3, the first stitch on needle 4, KFB the next stitch and knit to the end of the needle.
Next, knit a round normally. This loosens the stitches that you just made, while slowing the growth of the toe slightly.
For the third round, knit all the stitches on needles 1 and 2, knit to the second-last stitch of needle 3, KFB, knit the last stitch and the first on needle 4, KFB the second and knit to the end of needle 4.
The fourth round is another one of knit stitch.
Note: The above pattern is for the left foot. For the right foot, the increases on the third row are on the second-last stitch of needle 1 and the second stitch of needle 2 instead.
Work out how many stitches go around the ball of the foot by taking your measurement and multiplying it by your gauge. In my case, my gauge working in the round is 3 stitches / cm and the ball of my foot is 16 cm in circumference.
16 cm * 3 stitches / cm == 48 stitches
Knit the above four rounds until your toe has grown to the size measured around the instep, rounded to the nearest even number of stitches. If the yarn is stretchy, round down, if not, round up.

The toe will have a slightly more oblique slant on the side with twice as many increases (in this case, the left). It's a slight difference, but means that, when on the foot, the stitches will stretch more naturally across your toes.
The body of the foot
With the toe done, knit 3 centimetres of knit stitch (stockingette).
Now, if the instep is smaller than the ball of the foot, decrease by knitting the second and third last stitches of one needle together and knitting an SSK on the second and third stitches of the next, both on the opposite side to where you did twice as many increases. Repeat this until you have the right number of stitches for the instep.
SSK: Insert the right needle into the first stitch on the left as if to knit, then slip it. Repeat for the second. Insert the left needle through the front loops of the two slipped stitches, wrap the yarn around the right needle and pull it through, slipping the two stitches off the needle. (Video)
In my case, my instep is 15 cm around and my gauge is 3 stitches/cm, so I calculate the number of stitches for the instep as:
15 cm * 3 stitches / cm == 45 stitches
As that's an odd number and I'm using somewhat stretchy yarn, I round down to 44 stitches. To calculate the number of rounds I need to decrease on, I subtract the instep stitches from the stitches around the ball of my foot and divide by 2.
48 stitches around the ball - 44 stitches around the instep == 4 stitches
4 stitches / 2 decreases/round == 2 rounds of decreases
So, on the next two rounds, this being a left sock, I knit the second and third-last stitches of needle 1 together and I SSK the second and third stitches on needle 2. Were it a right sock, I would knit the second and third-last stitches of needle 3 together and SSK the second and third stitches of needle 4.
Repeat this for as many rounds as needed to get to the instep size, then continue knitting stockingette.

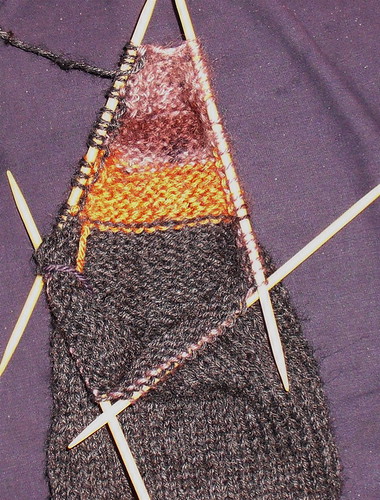
Shaping a gusseted heel
Begin the heel when the sock is between 60% and 70% the length of the foot, shorter for stretchy yarn, longer for more solid. The heel that I'm using is an adaptation of the pattern found here.

My foot is 22 cm long and I'm using stretchy yarn, so I calculate it as follows:
22 cm * 0.6 == 13.2 cm
Knowing that I have 4 rows of stockingette per centimetre, I knit 13 centimetres of foot, plus one row.
In the last few rows before shaping the heel, I increase back to the size of the ball of the foot, knitting front and back on the second-last stitch of needle 1 and doing another KFB on the second stitch of needle 2. Were this a right sock, I would do the same with needles 3 and 4 instead.
I want twice as many rows to increase as to decrease, so I do the two KFBs, followed by a round of knit stitch, twice, ending on a round of knit stitch.
Now, place all of the top stitches, plus 2/3 of the bottom stitches, onto another needle or a piece of scrap yarn.
In my case, the sock is 48 stitches around, so I place the 24 top stitches onto a needle, as well as 1/3 the bottom stitches, divided equally between left and right sides.
24 bottom stitches * 2 / 3 == 16
24 bottom stitches - 16 stitches remaining == 8 stitches set aside
8 stitches set aside / 2 == 4 stitches from each side
The stitches set aside are left alone while you knit the heel flap as flat stockingette (knit the right side, purl the wrong side). Continue knitting that until the sock plus heel flap is 90% or 95% the length of the foot.
In my case, with a 22 cm foot and stretchy yarn, I want the sock to total:
22 cm * 0.9 == 19.8 cm

Once the heel flap is the proper length, starting on the right side, knit all but the two last stitches, turn your work and purl all but the two last stitches. On the next row, knit all but the four last stitches, turn your work and purl all but the four last stitches.
Repeat this until only half the stitches on the heel flap are live, then, starting on a knit row, knit the live stitches, knitting the last live stitch together with the first one that was left alone. Finish the row by knitting the second stitch that was left alone.

On the next row, purl the live stitches, purling the last one together with the first one left alone. Purl the second one left alone. Repeat these two steps until all the stitches on the heel flap are live again. At this point, you will be on a knit row. Knit back across these to position the yarn for picking up the stitches.
Next, divide the stitches on the heel flap onto two double pointed needles and, starting on the side with the yarn, pick up the stitches along the side of the heel flap by lifting the stitch with another needle and knitting into it with the double pointed needle holding the yarn. (Video of picking up stitches)
Repeat this for every row of the heel flap plus one stitch beside your saved stitches. This ensures that there's no hole where the heel meets the top of the sock.
With a second double-pointed needle, knit half of the saved stitches. With a third, knit the other half and pick up along the other side of the heel flap. Finally, on the fourth needle, knit the remaining half of the heel flap. You should have two needles with few stitches on them and two needles with quite a lot, having picked up along the heel flap.

Divide the stitches among your four double-pointed needles so that the two that meet at the back of the heel have the heel stitches, the heel flap stitches and four of the stitches from the front of the sock.
From now on, the back of the sock is the starting point. The first needle is the left-hand heel needle, the second and third are the two on the front and the fourth is the other heel needle.
Knit all but 6 stitches on the first double-pointed needle, knit two stitches together, place a marker after that stitch, then knit the next four. Continue to knit across the top of the sock, placing a marker after the first four stitches on the fourth double-pointed needle. SSK the next two stitches, then continue to knit.
Continue knitting in the round, knitting the two before the first marker together and SSKing the two after the second marker, until you have the same number of stitches as for the instep.
Ankle and calf
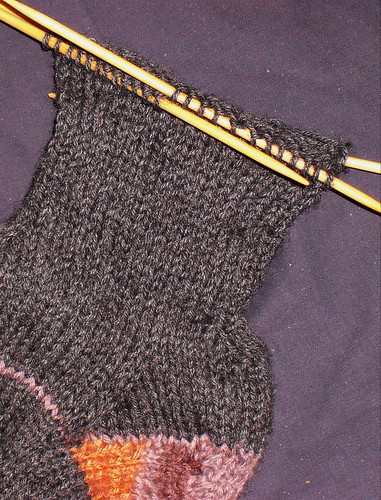
Knit one round after you finish shaping the heel. Now, you want to increase or decrease to the circumference of the ankle.

To decrease, knit one on the first needle, then SSK, knit the rest of the stitches until the third-last stitch on the fourth needle and knit two together, knitting the final stitch. Repeat this until you have the correct number of stitches for the ankle.
To increase, knit one on the first needle, knit the second stitch front and back, then knit the rest of the stitches until the second-last stitch on the fourth needle, KFB and knit the last stitch. Knit the next round normally and repeat these two rounds until you have the correct number of stitches for the ankle.
Continue to knit until you have 5 centimetres less than the desired length.
If you decreased for the ankle, knit half the stitches on each needle, then knit the next stitch front and back, repeating this for each needle, followed by a round of knit stitch, until you have the same number of stitches as you did for the ball of the foot.
The number of stitches around the calf should be a number evenly divisible by four.
Knit 5 centimetres of ribbing. The easiest way is to knit two stitches and purl the next two, repeating this around the cuff of the sock for 5 centimetres.
For these socks, I went with a variant ribbing pattern, where on one row, I knit two, placed the yarn in front of the work as if to purl, slipped two stitches purlwise, then placed the yarn at the back of the work again, repeating that for one round, then knitting the next.
When you have enough ribbing, cast off very loosely.

|
|