


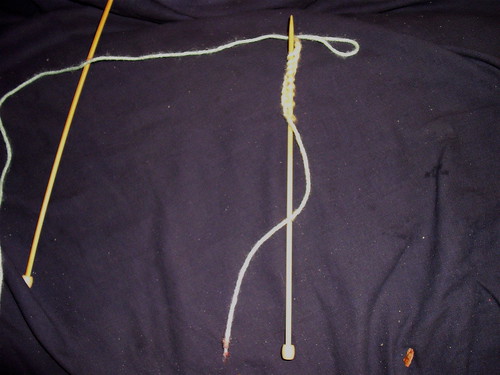
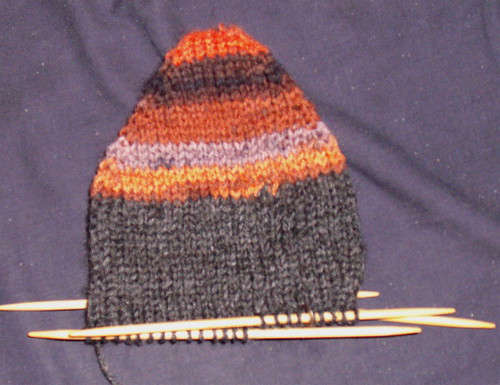
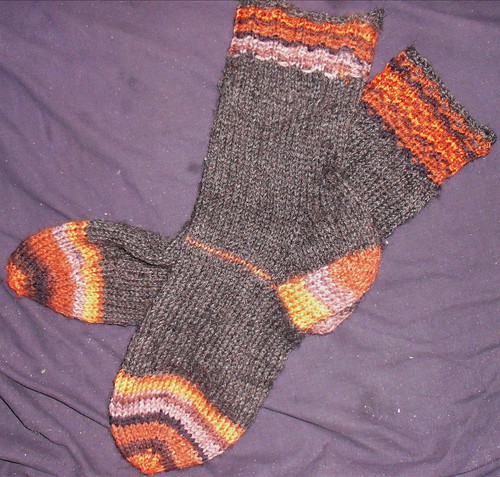
 Here is the travelling cable hat after I got done adding eight rounds of k2p2 rib to it. It's warmer, especially around the ears.
Joy of Cables Hat -- Completed extension
Joy of Cables Hat -- extension
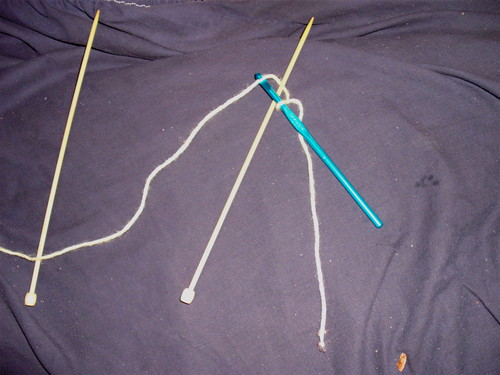
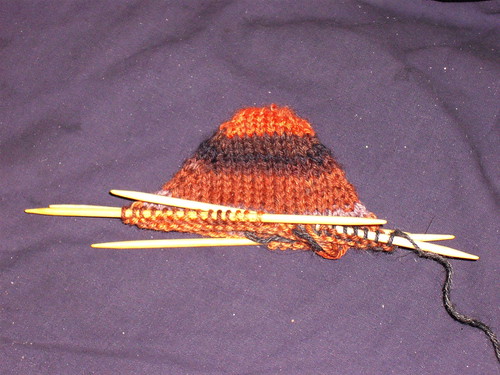
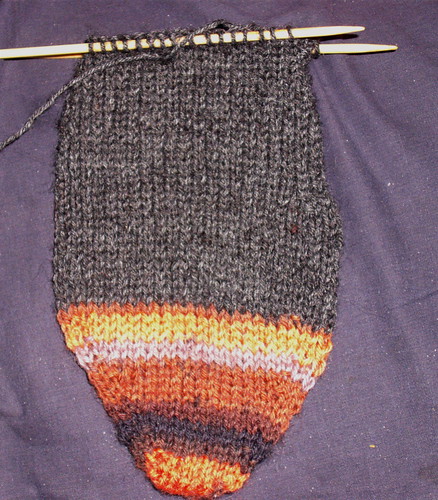
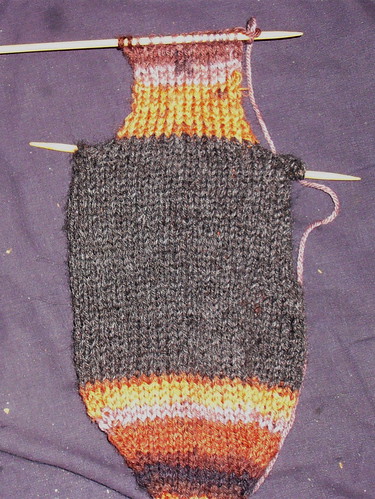
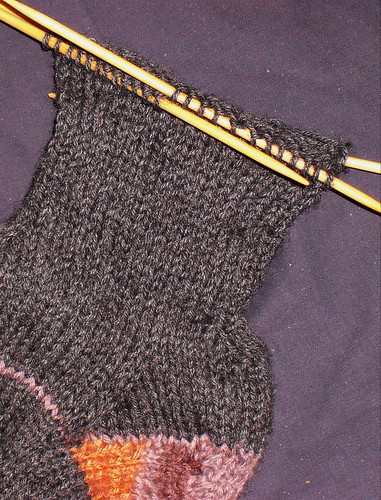
I've worn the Joy of Cables Hat for a few days now, and am finding that my fear of running out of yarn made for a hat that was a little too shallow. It just covers my ears and does so loosely.
Fortunately, I have plenty of yarn in other colours, so I'm going to extend the hat by 5cm or so. The edge is a simple k2p2 rib, so what I'll do is pick up stitches, purl one row to give the hat a line where it'll fold easily, then knit a brim in the same rib.
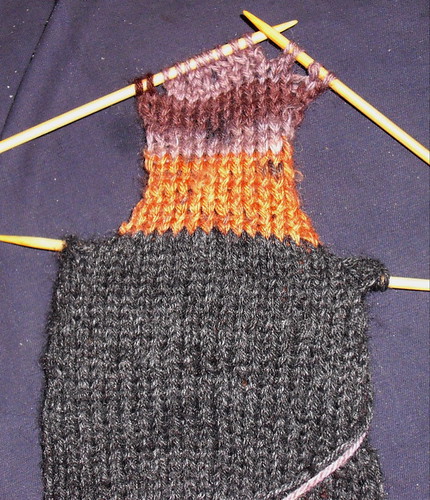
Because I'm trying to tighten the hat a bit as well, I'll keep the rib the same. Were it already a snug fit, I'd increase on rows 4 and 8, in the purl part of the ribbing.
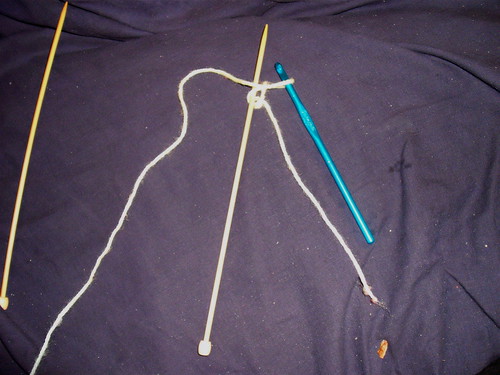
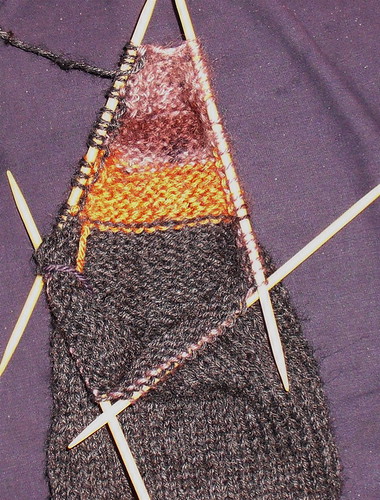
The hat was knit on 5mm needles, so I'll pick up with much smaller needles. The closest smallercircular needles at hand were 3.5mm, so I'm using those. Picking up stitches is a simple enough prospect: there's a hole just right of each stitch, so I insert a needle under both threads of the cast on, insert the point of my circular needle and knit a stitch. Then I repeat that 120 times, one per stitch.
After that, I'll knit from the 3.5mm needles onto 6mm ones, as that was the size used for the hat.
Broad Street Mittens - Sleeve part 2
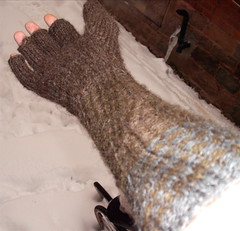
I have knit the right sleeve now. To fit my arm, it took a total of 68 rounds on 5mm DPNs. As well, to work the increases that were necessary to making the sleeve taper outward, I chose a style of increase that fit the pattern.
- Starting at the beginning of a rib, k3, p1, purl the front of the next stitch then knit the back (pfb). (6 stitches)
- k1, s1, k1, p3
- k2, p1, knit the front loop, then the back, of the next stitch (kfb), p1 (7 stitches)
- k1, s1, k1, p1, k2, p1
- k3, pfb, k2, pfb (9 stitches)
- k1, s1, k1, p2, k2, p2
- k3, p2, k1, kfb, p2 (10 stitches)
- k1, s1, k1, p2, k1, s1, k1, p2
- k3, p2, k3, p2
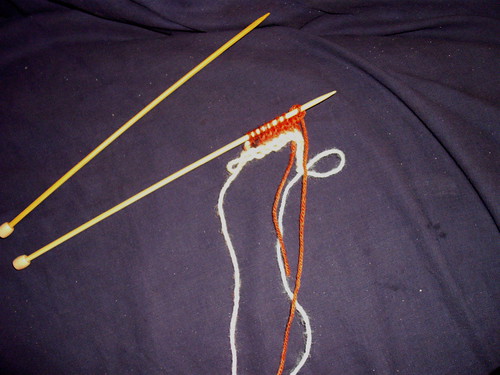
At this point, another rib has been added, appearing as a line of knit stitches in the middle of a column of purl stitches.
I did this twice, once after knitting 30 rounds and again after knitting 50. This allowed me to keep the glove tight around the wrist, flaring slightly as it approached my elbow.
Because I like the zigzag that the ribbing pattern gives, I alternated green and brown yarns for the majority of it, ending the upper sleeve with a change to green and grey for ten rounds each.
Broad Street Mittens -- Sleeve
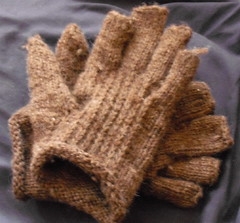
I've now knitted one pair of Janis Cortese's Broad Street Mittens in worsted yarn. They fit nicely, but, unfortunately, only come to my wrist as I've not yet started knitting the cuff/sleeve.
I want the sleeve to be at least 30 cm, so left it out of knitting the mittens until I saw how they turned out. Though, I suppose that I could have started with the sleeve and converted it into arm warmers after the fact.
I know that the current cuff of the mittens is 40 stitches around. I also know that my wrist is tiny, so what I intend to do is reduce to 30 stitches around (I pulled the cuff of the glove tight and counted the number of stitches around my wrist) and then add 5 stitches halfway up my arm.
Why 5? Well, I've found myself knitting a lot of k2p2 rib recently, so want to do something different, especially seeing as it looks serviceable but ultimately uninteresting when worked in multiple colours. I have a nice olive drab yarn that I bought when I was first considering these mittens, and I'd like the sleeves to be striped.
With those two constraints in mind, I considered various ribbings and decided that I'd work the following pattern:
- knit 1, slip 1 purlwise with yarn in back, knit 1, purl 2 (repeat from start)
- knit 3, purl 2 (repeat from start)
That way, the slipped stitches break the monotony of simple circular stripes, forming a slight wave pattern with the purl stitches, while still providing the texture and stretchiness of ribbing.
The final consideration is what gauge to use. I'd considered knitting the sleeve on 3.75mm needles, but gradually decided that, since it's a layer that will be worn along with a shirt and coat, that I might be wise to use 5mm needles to get a looser fabric. That means that, rather than using 30 stitches as I'd intended, I'll need to use fewer.
My gauge on the gloves was 8 stitches / inch and my gauge on the 5mm needles with worsted yarn is 5 stitches/inch. From there, it's simple algebra to figure out how many I need:
desired stitches / 30 == 5 st/in / 8 st/in
desired stitches == ( 5 / 8 ) * 30
desired stitches = 18.75
Since the pattern I'm using for the ribbing is a repeat of 5 stitches, I round 18.75 to 20 and know that I need to decrease half the stitches to make it fit. In order to keep the glove from puffing out, I'm going to try picking up 40 stitches then decreasing ten of them the next row, knitting one row straight, then decreasing ten times on the next row.
If that doesn't work, I'll rip it out, pick up and knit a round with 3.75mm needles, decrease to 30 stitches and then knit onto the 5mm needles.
A note, though: to keep the fabric from stretching as I pick up, that will be done on 3.75mm needles and the second round will be knit onto the 5mm ones.
Broad Street Mittens (errata)
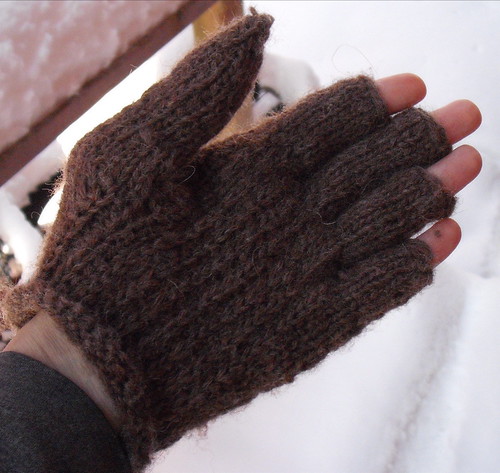
I'm currently knitting Janis Cortese's lovely Broad Street mittens, from the fall 2002 issue of Knitty. In looking over the pattern, I decided to make a few adjustments in the interest of warmth.
This is not a pattern so much as it is a list of modifications to the Broad Street pattern.
Firstly, the pattern is meant to be knit with small needles and fingering-weight wool. I decided that I wanted worsted wool, partly for warmth and partly because, when contemplating the pattern, I bought two balls of worsted in preparation.
In what could be considered a moderately silly gauge swatch, I knit the palm, following the pattern. Then, comparing the half-glove hat I had to the size of my hand, I worked out that it was about 50% too big.
I cast on again, starting from the wrist as before. This time, knowing the difference in size, I used 40 stitches of worsted weight on 3.75 mm needles, for a tight, dense fabric. The reason for starting at the wrist rather than the cuff is that I'm planning to knit elbow-length sleeves onto the gloves, so will pick up around the wrist and knit until I'm satisfied.
I knit two rows before getting to my second change: rather than knitting the palm in stockingette, I want it to be a thicker, denser fabric. A quick browse of Barbara Walker's Treasury of Knitting Patterns gave me k1s1 rib, or heel stitch.
Thus the pattern for the palm became:
- knit the whole round
- knit the whole round
- k2, *k1, slip one stitch purlwise with the yarn in back, repeat from * until the second-last stitch on the second needle. p1, knit the last stith front and back. Knit the rest of the round.
- knit the whole round
- k2, *k1, sl1 wyib, repeat from * until reaching the purled stitch. p1, kfb. Knit the rest of the round.
- knit the whole round.
I repeated steps 5 and 6 until I'd added eight stitches, set those stitches aside and cast on nine stitches on the next row.
For the thumb gusset decrease, I used the SSK/k2tog decrease until I again had ten stitches on the second needle.
To finish the palm, I knit 12 rows with heel stitch on the palm, stockingette on the back. The glove is longer lengthwise because the heel stitch used makes a far denser fabric vertically. Also, my hands are very long. Following the pattern, 8 rows would be more accurate.
Pinky finger was 4 from the palm, 5 from the back, plus one cast-on stitch.
Extending the palm, I picked up 3 stitches from the pinky, rather than 2, to ensure no holes. Knit 8 rounds, heel stitch on the front, stst on the back.
The other fingers were 12 stitches, 16 stitches and 16 stitches, using 3 stitches picked up from the finger beside them each time.
For the thumb, I picked up 12 stitches from the cast-on stitches and immediately decreased from 22 to 18, at a rate of two decreases every other row. The thumb was finished in the same way as described in the pattern.
Joy of Cables Hat

This is a pattern for a hat that just popped into my head. I thought it would be neat to use cables in a spiral pattern, so that half the cables turned right and the other half turned left. As I was knitting it, I added a few more things, like the cables being woven into an over/under/over basketweave.
The hat is surprisingly soft and warm (I knit it from heavy worsted weight wool) and, because it is, in essence, a k2 p2 rib all the way around, it has a good amount of give to it.
The pattern has cabling on three rounds of every eight, but it repeats often enough that it's elatively simple to keep in your head.

Requirements:
- Double-pointed needles (I used 5mm DPNs)
- Optionally circular needles in the same gauge.
- 100 to 150 metres of worsted weight yarn.
I knit the hat with a gauge of 2 stitches / cm in k2p2 rib and 5 rounds / 2 cm, but the pattern adapts easily to different sizes by adding or removing repeats both around and vertically.
Cast on enough stitches on circular or double-pointed needles to go loosely around the head, with the number of stitches being a multiple of 8. The pattern repeats are 8 stitches long, with two cables being worked every 8 stitches.
Join in the round, then knit 2, purl 2 and mark that point as the start of your round. The pattern from here on will be expressed as a set of eight stitches. Repeat that as many times as needed to finish the round.
| Rows 1-12 | k2, p2, k2, p2 |
| Row 13 | Cable 2 left (c2l: Place two stitches on a cable needle or double-pointed needle, hold them in front of the work. Purl the third stitch then knit the two stitches off the cable needle.), cable 2 right (c2r: Place one stitch on another needle, holding it to the back of the work. Knit the next two then purl the stitch off of the cable needle), p2 |
| Row 14 | p1, cable 2x2 right (c2x2r: Place two stitches on a cable needle, holding it to the back of the work. Knit the next two then knit the stitches off of the cable needle), p3 |
| Row 15 | p1, k4, p3 |
| Row 16 | C2r, c2l, p2 |
At this point, every pair of cables has moved toward each other and crossed over, with the left cable going over the right.
| Rows 17-19 | k2, p2, k2, p2 |
| Row 20 | k2, p2, k2, p2 |
| Stop this round four stitches before the end and mark this point. There should be one column of ribbing left. For the next four rounds, this is the new beginning of the round. | |
| Row 21 | c2l, c2r, p2 |
| Row 22 | p1, cable 2x2 left (c2x2l: Place two stitches on a cable needle, holding it to the front of the work. Knit the next two then knit the stitches off of the cable needle.), p3 |
| Row 23 | p1, k4, p3 |
| Row 24 | c2r, c2l, p2 |
| Row 25 | k2, p2, k2, p2 |
| At the end of this round, move the beginning of the round forward four stitches, so that it's back to where it was originally. | |
| Rows 26-28 | k2, p2, k2, p2 |
| Row 29 | c2l, c2r, p2 |
| Row 30 | p1, c2x2r, p3 |
| Row 31 | p1, k4, p3 |
| Row 32 | c2r, c2l, p2 |
| Rows 33-35 | k2, p2, k2, p2 |
| Row 36 | k2, p2, k2, p2, marking 4 stitches before the end as the new beginning of the round. |
| Row 37 | c2l, c2r, p2 |
| Row 38 | p1, c2x2l, p3 |
This is where I chose to begin decreasing. If you want a deeper hat, continue the pattern, knitting rows 23-38 until the hat is as long as you want it and stopping on a row where you are either cabling 2x2 left or cabling 2x2 right.
For the decrease rows, the pattern repeats quicker and quicker as you go because the pattern is decreasing in size with every row. Row 1 repeats every 8 stitches, row 2 every 6, row 3 every 5, etc.
If you are using circular needles, when the hat becomes too tight on them, switch to double-pointed needles in the same size.
| Decrease row 1 | Slip slip knit (ssk: slip two stitches, inserting the right needle as if to knit them. Insert the left needle into the front loops of the slipped stitches, wrap the yarn around the right needle and draw it through the loops), knit two together (k2tog: insert the right needle through the front loops of the first two stitches on the left needle. Knit these stitches as if they were a single stitch), p4 |
| Decrease row 2 | SSK, p4 |
| Decrease row 3 | SSK, p3 |
| Decrease row 4 | SSK, p2 |
| Decrease row 5 | SSK, p1 |
| Decrease row 6 | SSK |
Repeat row 6 until you have fewer than ten stitches on your needles. Take the yarn and pull it through all of the remaining stitches before sliding them off the needle. Pull the yarn inside the hat and tug it tight.
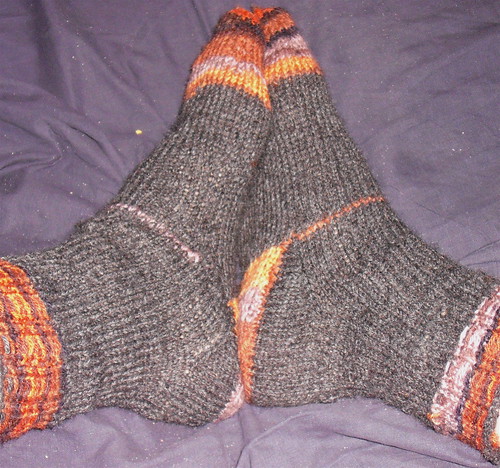
Simple Toe-up Socks
This is a pattern for toe-up socks. I amended several sock patterns and blended them together after finding that none of the patterns that I found on the internet fit my foot exactly.
These socks are fitted, so knowing your gauge with the needles and yarn that you'll be using is a must. As well, you'll need to know the length of the foot, the circumference around the ball of the foot, the circumference around the instep and the circumference around the ankle.
Casting on
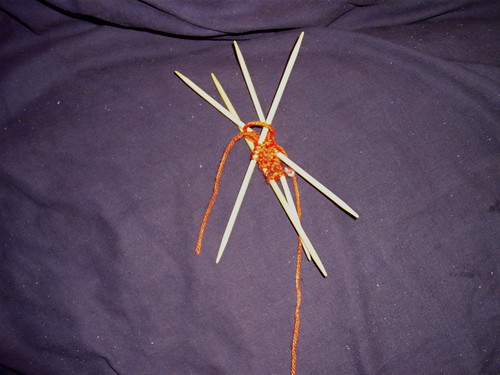
The sock starts with a provisional cast on. The way that I find easiest is to crochet a chain around a needle, that way it incorporates both the crochet chain and picking up the stitches into a single step. The toe is an adaptation of a pattern in Knitty.
Using scrap yarn, start by tying a slip knot around a crochet hook. Then, wrapping the yarn behind a knitting needle, draw the yarn through the loop on the crochet hook, making a stitch.
You should have one loop on the crochet hook and one stitch below it, with the yarn wrapped around your knitting needle.
Repeat this process until you have at least eight stitches wrapped around the needle, then continue crocheting a chain without wrapping the yarn around the needle. This tail is useful to show what side you'll pull on to unzip the chain later on. (Video of crocheting a provisional cast on)
Next, with your working yarn, knit eight of the stitches on the needle, then continue working in stockingette until you have four rows, two knit and two purl.
Separate the eight live stitches onto two double-pointed needles, then pull on the tail of the crochet chain to unfasten it, picking up the stitches of working yarn onto another two needles.
Knitting the toe
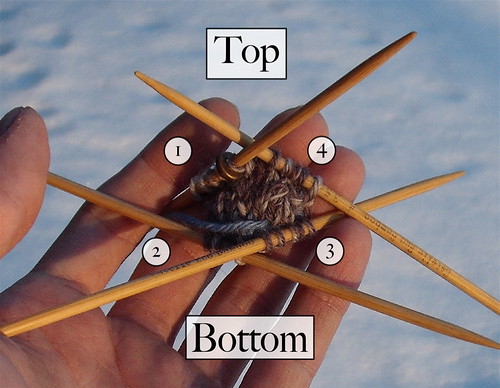
The first two needles are the top of the foot and the second two are the bottom. Knit the first four stitches, mark the second needle (it will be the start of the round, or needle 1) and continue knitting in the round until you're back to the first needle.
I like having the tip of the sock sit over my big toe, so I work the increases in a way that makes the toe lopsided. The pattern for this is:
Knit all but two stitches on needle 1, then knit the front and back (KFB) of the second-last stitch, inserting the right needle for a knit stitch, pulling a loop of yarn through, then inserting the right needle through the back loop of the same stitch, pulling a second loop of yarn through, then sliding the stitches off of the left needle.
Knit the last stitch on needle 1, the first stitch on needle 2, KFB the second stitch, then knit to the second-last stitch on needle 3. KFB that stitch, knit the last stitch on needle 3, the first stitch on needle 4, KFB the next stitch and knit to the end of the needle.
Next, knit a round normally. This loosens the stitches that you just made, while slowing the growth of the toe slightly.
For the third round, knit all the stitches on needles 1 and 2, knit to the second-last stitch of needle 3, KFB, knit the last stitch and the first on needle 4, KFB the second and knit to the end of needle 4.
The fourth round is another one of knit stitch. Note: The above pattern is for the left foot. For the right foot, the increases on the third row are on the second-last stitch of needle 1 and the second stitch of needle 2 instead.
Work out how many stitches go around the ball of the foot by taking your measurement and multiplying it by your gauge. In my case, my gauge working in the round is 3 stitches / cm and the ball of my foot is 16 cm in circumference.
16 cm * 3 stitches / cm == 48 stitches
Knit the above four rounds until your toe has grown to the size measured around the instep, rounded to the nearest even number of stitches. If the yarn is stretchy, round down, if not, round up.
The toe will have a slightly more oblique slant on the side with twice as many increases (in this case, the left). It's a slight difference, but means that, when on the foot, the stitches will stretch more naturally across your toes.
The body of the foot
With the toe done, knit 3 centimetres of knit stitch (stockingette).
Now, if the instep is smaller than the ball of the foot, decrease by knitting the second and third last stitches of one needle together and knitting an SSK on the second and third stitches of the next, both on the opposite side to where you did twice as many increases. Repeat this until you have the right number of stitches for the instep. SSK: Insert the right needle into the first stitch on the left as if to knit, then slip it. Repeat for the second. Insert the left needle through the front loops of the two slipped stitches, wrap the yarn around the right needle and pull it through, slipping the two stitches off the needle. (Video)
In my case, my instep is 15 cm around and my gauge is 3 stitches/cm, so I calculate the number of stitches for the instep as:
15 cm * 3 stitches / cm == 45 stitches
As that's an odd number and I'm using somewhat stretchy yarn, I round down to 44 stitches. To calculate the number of rounds I need to decrease on, I subtract the instep stitches from the stitches around the ball of my foot and divide by 2.
48 stitches around the ball - 44 stitches around the instep == 4 stitches
4 stitches / 2 decreases/round == 2 rounds of decreases
So, on the next two rounds, this being a left sock, I knit the second and third-last stitches of needle 1 together and I SSK the second and third stitches on needle 2. Were it a right sock, I would knit the second and third-last stitches of needle 3 together and SSK the second and third stitches of needle 4.
Repeat this for as many rounds as needed to get to the instep size, then continue knitting stockingette.
Shaping a gusseted heel
Begin the heel when the sock is between 60% and 70% the length of the foot, shorter for stretchy yarn, longer for more solid. The heel that I'm using is an adaptation of the pattern found here.
My foot is 22 cm long and I'm using stretchy yarn, so I calculate it as follows:
22 cm * 0.6 == 13.2 cm
Knowing that I have 4 rows of stockingette per centimetre, I knit 13 centimetres of foot, plus one row.
In the last few rows before shaping the heel, I increase back to the size of the ball of the foot, knitting front and back on the second-last stitch of needle 1 and doing another KFB on the second stitch of needle 2. Were this a right sock, I would do the same with needles 3 and 4 instead.
I want twice as many rows to increase as to decrease, so I do the two KFBs, followed by a round of knit stitch, twice, ending on a round of knit stitch.
Now, place all of the top stitches, plus 2/3 of the bottom stitches, onto another needle or a piece of scrap yarn.
In my case, the sock is 48 stitches around, so I place the 24 top stitches onto a needle, as well as 1/3 the bottom stitches, divided equally between left and right sides.
24 bottom stitches * 2 / 3 == 16
24 bottom stitches - 16 stitches remaining == 8 stitches set aside
8 stitches set aside / 2 == 4 stitches from each side
The stitches set aside are left alone while you knit the heel flap as flat stockingette (knit the right side, purl the wrong side). Continue knitting that until the sock plus heel flap is 90% or 95% the length of the foot.
In my case, with a 22 cm foot and stretchy yarn, I want the sock to total:
22 cm * 0.9 == 19.8 cm
Once the heel flap is the proper length, starting on the right side, knit all but the two last stitches, turn your work and purl all but the two last stitches. On the next row, knit all but the four last stitches, turn your work and purl all but the four last stitches.
Repeat this until only half the stitches on the heel flap are live, then, starting on a knit row, knit the live stitches, knitting the last live stitch together with the first one that was left alone. Finish the row by knitting the second stitch that was left alone.
On the next row, purl the live stitches, purling the last one together with the first one left alone. Purl the second one left alone. Repeat these two steps until all the stitches on the heel flap are live again. At this point, you will be on a knit row. Knit back across these to position the yarn for picking up the stitches.
Next, divide the stitches on the heel flap onto two double pointed needles and, starting on the side with the yarn, pick up the stitches along the side of the heel flap by lifting the stitch with another needle and knitting into it with the double pointed needle holding the yarn. (Video of picking up stitches)
Repeat this for every row of the heel flap plus one stitch beside your saved stitches. This ensures that there's no hole where the heel meets the top of the sock.
With a second double-pointed needle, knit half of the saved stitches. With a third, knit the other half and pick up along the other side of the heel flap. Finally, on the fourth needle, knit the remaining half of the heel flap. You should have two needles with few stitches on them and two needles with quite a lot, having picked up along the heel flap.
Divide the stitches among your four double-pointed needles so that the two that meet at the back of the heel have the heel stitches, the heel flap stitches and four of the stitches from the front of the sock.
From now on, the back of the sock is the starting point. The first needle is the left-hand heel needle, the second and third are the two on the front and the fourth is the other heel needle.
Knit all but 6 stitches on the first double-pointed needle, knit two stitches together, place a marker after that stitch, then knit the next four. Continue to knit across the top of the sock, placing a marker after the first four stitches on the fourth double-pointed needle. SSK the next two stitches, then continue to knit.
Continue knitting in the round, knitting the two before the first marker together and SSKing the two after the second marker, until you have the same number of stitches as for the instep.
Ankle and calf
Knit one round after you finish shaping the heel. Now, you want to increase or decrease to the circumference of the ankle.
To decrease, knit one on the first needle, then SSK, knit the rest of the stitches until the third-last stitch on the fourth needle and knit two together, knitting the final stitch. Repeat this until you have the correct number of stitches for the ankle.
To increase, knit one on the first needle, knit the second stitch front and back, then knit the rest of the stitches until the second-last stitch on the fourth needle, KFB and knit the last stitch. Knit the next round normally and repeat these two rounds until you have the correct number of stitches for the ankle.
Continue to knit until you have 5 centimetres less than the desired length.
If you decreased for the ankle, knit half the stitches on each needle, then knit the next stitch front and back, repeating this for each needle, followed by a round of knit stitch, until you have the same number of stitches as you did for the ball of the foot.
The number of stitches around the calf should be a number evenly divisible by four.
Knit 5 centimetres of ribbing. The easiest way is to knit two stitches and purl the next two, repeating this around the cuff of the sock for 5 centimetres.
For these socks, I went with a variant ribbing pattern, where on one row, I knit two, placed the yarn in front of the work as if to purl, slipped two stitches purlwise, then placed the yarn at the back of the work again, repeating that for one round, then knitting the next.
When you have enough ribbing, cast off very loosely.
Clojure code, round 2
;;; A simple application that acts as a very primitive time server and
;;; client.
(import '(java.net BindException ServerSocket Socket)
'(java.lang.reflect InvocationTargetException)
'(java.util Date)
'(java.io InputStream OutputStream StringWriter)
'(java.util.concurrent Executors))
;;; Globals
(def DEFAULT-PORT 51345)
;; A structure defining the data in a unit test, as well as a global
;; list of all the tests.
(defstruct unit-test :name :description :function :after)
(def ALL-TESTS {})
;;; Testing functions
;; Unit test accessors
(def unit-test-name (accessor unit-test :name))
(def unit-test-description (accessor unit-test :description))
(def unit-test-function (accessor unit-test :function))
(def unit-test-after (accessor unit-test :after))
;; Add a new test structure to the list of unit tests, or replaces the
;; existing test of that name if it already exists.
(defn unit-tests-add [test]
(def ALL-TESTS
(assoc ALL-TESTS (unit-test-name test) test)))
;; Takes an unsorted and a sorted list of unit tests and moves / sorts
;; some of the tests in the unsorted list over to the sorted list
(defn unit-test-list-helper [unsorted sorted]
(let [nils (filter (comp not unit-test-after)
unsorted)
alls (filter (comp (appl eql? :all) unit-test-after)
unsorted)
others (filter (fn [t] (not-any? (fn [x] (eql? (unit-test-after t)
(unit-test-after x)))
(concat nils alls)))
unsorted)
in-sorted (fn [t] (some (fn [x] (eql? (unit-test-name x)
(unit-test-after t)))
(concat nils sorted)))]
(cond (first nils)
(list (concat alls
(filter (complement in-sorted)
others))
(concat nils
(filter in-sorted others)))
(== (count alls)
(count unsorted))
(list nil
(concat sorted alls))
:t
(list (concat alls
(filter (complement in-sorted)
others))
(concat sorted
(filter in-sorted others))))))
;; Returns a list of unit tests, sorted according to their :after
;; statement.
(defn unit-test-list
([]
(unit-test-list (vals ALL-TESTS) nil))
([unsorted sorted]
(if (not (first unsorted))
(map (fn [test] (list (unit-test-description test)
(unit-test-function test)))
sorted)
(let [helped-list (unit-test-list-helper unsorted sorted)
unsorted (first helped-list)
sorted (second helped-list)]
(recur unsorted sorted)))))
;; Run all the defined tests
(defn test-all []
(let [test-out (new StringWriter)]
(loop [test-list (unit-test-list)
failure false]
(let [test (first test-list)
test-list (rest test-list)]
(cond (not test)
(do (if failure
(println "---\nSome tests failed.")
(println "---\nAll tests passed."))
(list failure test-out))
:t
(let [test-result (time (binding [*out* test-out]
(eval (list (second test)))))]
(println "Testing" (first test) ":" test-result)
(recur test-list
(when (or (not test-result)
failure)
true))))))))
;; Define a testing function. Same syntax as defn, only with a
;; description string and a list of extras (may be empty)
(defmacro deftest [fname description extras & fdecl]
`(do (defn ~fname ~@fdecl)
(unit-tests-add (struct unit-test
:name (name '~fname)
:description ~description
:function ~fname
~@extras))
#'~fname))
;;; Utility functions
(defn current-time []
(str (new Date)))
;; Generate an array of bytes from a string, suitable for passing to a
;; write() method.
;;
;; Has a unit test.
(defn byte-arr-from-string [#^String str]
(. str (getBytes)))
(deftest test-byte-array-from-string "string->byte array conversion" ()
([]
(test-byte-array-from-string (current-time)))
([str]
(let [barr (byte-arr-from-string str)
bseq (map (comp char (appl aget barr))
(range (alength barr)))
chseq (map char str)]
(and (== (alength barr)
(count bseq)
(count chseq))
(some true?
(map eql?
bseq
chseq))))))
;; Takes a sequence of bytes (not a byte array, but a sequence) and
;; concatenates it into a string.
(defn string-from-byte-sequence [coll]
(reduce strcat
(map char coll)))
;; Gets the integer length of a string. Returns nil for "" and nil.
(defn #^Int length-of-string [#^String string]
(if string
(. string (length))
0))
;;; Listener functions
;;; These control the server
;; Make a new listener. Returns that listener or nil if no listener
;; can be created on that port.
;;
;; Has a unit test.
(defn #^ServerSocket listener-new
([]
(listener-new DEFAULT-PORT))
([port]
(try (new ServerSocket port)
(catch BindException except
(println "Address is already in use.")))))
(deftest test-listener-new "creating a listener" ()
([]
(test-listener-new DEFAULT-PORT))
([port]
(with-open listener (listener-new port)
(when listener
true))))
;; Logical predicates for whether a listener is open or closed.
;;
;; Have unit tests.
(defn #^Boolean listener-closed? [#^ServerSocket listener]
(. listener (isClosed)))
(def listener-open? (complement listener-closed?))
(deftest test-listener-predicates "listener open?/closed? predicates"
(:after "test-listener-new")
([]
(test-listener-predicates DEFAULT-PORT))
([port]
(let [listener (listener-new port)
tests (and (not (listener-closed? listener))
(listener-open? listener))]
(. listener (close))
(and tests
(not (listener-open? listener))
(listener-closed? listener)))))
;; Wait for a connection to a given listener the return the socket to
;; that connection.
;;
;; NOTE: This function is blocking.
(defn #^Socket listener-wait [#^ServerSocket listener]
(. listener (accept)))
;; Closes a given listener. Really only for use from the REPL or from
;; unit tests, as actual code should be using (with-open ...)
;;
;; Has a unit test.
(defn listener-close [#^ServerSocket listener]
(. listener (close)))
(deftest test-listener-close "closing a listener"
(:after "test-listener-predicates")
([]
(let [listener (listener-new DEFAULT-PORT)]
(and (listener-open? listener)
(not (listener-close listener))
(listener-closed? listener)))))
;; Takes a socket, sends the current time through it, closes the
;; socket's output and returns the socket.
(defn #^Socket listener-send [#^Socket lsocket]
(.. lsocket
(getOutputStream)
(write (byte-arr-from-string (current-time))))
(.. lsocket (getOutputStream) (close))
lsocket)
;; Launches the supplied listener and then loops, waiting for
;; connections.
;;
;; NOTE: Because it depends of (listener-wait ...), which is blocking,
;; this is qlso blocking.
(defn listener-run [listener port]
(loop [socket nil]
(if (listener-closed? listener)
listener
(do (when socket
(. (listener-send socket) (close)))
(recur (listener-wait listener))))))
;; Launches a listener as a background thread. Returns that listener.
(defn listener-run-in-background
([]
(listener-run-in-background DEFAULT-PORT))
([port]
(let [listener (listener-new port)
exec (. Executors (newSingleThreadExecutor))
run (appl listener-run listener port)]
(when listener
(. exec (submit run)))
listener)))
;;; Connection functions
;;; These control the client.
;; Makes a new connection to a listener. Times out in 5 seconds if no
;; connection is made.
;;
;; Has a unit test.
(defn connection-new
([]
(connection-new DEFAULT-PORT))
([port]
(connection-new "127.0.0.1" port))
([address port]
(try (doto (new Socket address port)
(setSoTimeout 5000))
(catch InvocationTargetException except
(println (strcat "Could not connect to "
address
" on port "
port))))))
(deftest test-connection-new "creating a connection"
(:after "test-listener-close")
([]
(let [listener (listener-run-in-background)
connection (connection-new)]
(and (connection-new)
(not (listener-close listener))
(not (connection-new))))))
;; Reads data from a supplied socket as an array of bytes. Stops on
;; timeout and when receiving the -1 end of stream byte.
(defn connection-read [#^Socket conn]
(let [instream (. conn (getInputStream))
reader (fn [] (try (. instream (read))
(catch InvocationTargetException except
-1)))]
(loop [bytes nil
current-byte (reader)]
(if (== current-byte -1)
bytes
(recur (concat bytes (list current-byte))
(reader))))))
;; Closes an open socket.
(defn connection-close [#^Socket conn]
(. conn (close)))
;; Opens a connection to a listener, reads out a byte sequence, then
;; returns that sequence as a string.
;;
;; Has a unit test.
(defn connection-run
([]
(connection-run DEFAULT-PORT))
([port]
(let [conn (connection-new port)
str (when conn
(string-from-byte-sequence (connection-read conn)))]
(when conn
(connection-close conn))
str)))
(deftest test-connection-run "running a complete connection"
(:after :all)
([]
(let [listener (listener-run-in-background)
result (connection-run)]
(and (listener-open? listener)
(not (listener-close listener))
(listener-closed? listener)
(<= 0 (length-of-string result))
(== 0 (length-of-string (connection-run)))))))
Clojure: continuing to look
My second look at Clojure
Casting and complements
As demonstrated to me, (. listener (isClosed)) returns a fresh
boolean, rather than Boolean.TRUE or Boolean.FALSE. So, while
the symbol looks fine in the REPL, when passed to (if (. listener
(isClosed)) ...), it is always true.
So, I made the following pair of complementary1 utility functions:
(defn #^Boolean listener-closed? [#^ServerSocket listener]
(. listener (isClosed)))
def listener-open? (complement listener-closed?))
complement takes a function as its argument and returns a function
that does exactly the same thing as that function, only with its
return value inverted. Thus, (complement listener-closed?) returns a
function that does exactly what listener-closed? does and then
returns the opposite value.
In this case, it saves me from having to repeat listener-closed?'s
details. That way, if I ever need to change listener-closed, in
order, say, to handle more than simple Java ServerSockets, I can do so
without having to make any changes to listener-open?.
Note, though, that listener-open? is a def and not a
defn. That's because defn is a macro that wraps an fn
around its body. complement, on the other hand, returns an
fn, so I only need to bind it to a Var.
I then amended listener-run so that it uses this explicit cast
rather than just taking what ``ServerSocket gives it.
(defn listener-run [listener port]
(loop [socket nil]
(if (listener-closed? listener)
listener
(do (when socket
(. (listener-send socket) (close)))
(recur (listener-wait listener))))))
So, while I'm assigning casting, I should likely take care of the warnings on loading this file, if for no reason other than that they're starting to get a little excessively verbose.
user=> (load-file "/clojure/src/sockets.clj")
Reflection warning, line: 17 - call to getBytes can't be resolved.
Reflection warning, line: 53 - call to accept can't be resolved.
Reflection warning, line: 56 - call to close can't be resolved.
Reflection warning, line: 397 - call to getOutputStream can't be resolved.
Reflection warning, line: 396 - call to write can't be resolved.
Reflection warning, line: 397 - call to getOutputStream can't be resolved.
Reflection warning, line: 396 - call to close can't be resolved.
Reflection warning, line: 70 - call to close can't be resolved.
Reflection warning, line: 78 - call to submit can't be resolved.
Reflection warning, line: 88 - call to java.net.Socket ctor can't be resolved.
Reflection warning, line: 97 - call to getInputStream can't be resolved.
Reflection warning, line: 98 - call to read can't be resolved.
Reflection warning, line: 109 - call to close can't be resolved.
#<Var: user/connection-run>
Simply, I went through and placed type hints on functions that call out to Java in order to ensure that their methods resolve on load.
Since I also noticed a few new things while reformatting the Clojure
manual into a single
texinfo document for my own use, I'll also change my use of (. var
(toString) to use Clojure's str function:
(str x) Returns x.toString(). (str nil) returns ""
Building a testing framework
All of those casts are fairly minor refactorings that just make the
statement of what a listener and connection are to the
compiler. On the other hand, the bug that I started with this time
would have been caught by the other thing I've been putting off.
Namely, actual an testing framework, rather than just eyeballing
results in the REPL.
Now, I could go find JUnit, install that, and then see how well Clojure links into it. But, well, that sounds like a new project1.
So, instead, what I'll look at is defining what it is that my functions are supposed to be doing, write a few tests, then add a framework to glue those tests together.
Ugliness ensues...
Which ended up looking like:
(def DEFAULT-PORT 51345)
(defn test-byte-array-from-string
([]
(test-byte-array-from-string (current-time)))
([str]
(let [barr (byte-arr-from-string str)
bseq (map (comp char (appl aget barr))
(range (alength barr)))
chseq (map char str)]
(and (== (alength barr)
(count bseq)
(count chseq))
(nil? (first (filter false?
(map eql?
bseq
chseq))))))))
(defn test-listener-new
([]
(test-listener-new DEFAULT-PORT))
([port]
(with-open listener (listener-new port)
(when listener
true))))
(defn test-listener-predicates [])
(defn test-all []
(loop [test-list '(("string->byte array conversion"
test-byte-array-from-string)
("creating a listener",
test-listener-new)
("listener open?/closed? predicates"
test-listener-predicates))
failure false]
(let [this-test (first test-list)
test-list (rest test-list)]
(if (not this-test)
(if failure
(println "---\nSome tests failed.")
(println "---\nAll tests succeeded."))
(let [test-result (time (eval (rest this-test)))]
(println "Testing" (first this-test) ":" test-result
(if (first test-list) "\n" ""))
(recur test-list
(when (or failure
(not test-result))
And, running it, I get:
user=> (test-all)
"Elapsed time: 8.437664 msecs"
Testing string->byte array conversion : true
"Elapsed time: 68.38411 msecs"
Testing creating a listener : true
"Elapsed time: 2.831645 msecs"
Testing listener open?/closed? predicates : nil
---
Some tests failed.
nil
So, it works. (Noting that I deliberately built one of those tests to
fail, to make sure that the testing function catches failure.) Except
that, well, how best to put it... Eww. I know that so far this is
only 150 lines, but I'm not going to remember to update the list of
tests down in the testing function every time I make a new one. So,
I'll run test-all, realise that my new test is missing, then go
back and add the new test.
Adding structure...
No, I think what I need here is for the test itself to hold its own payload. Sounds like a reasonable time to add in a struct, really. A struct is just a defined hashmap taking keywords as arguments. For starters, I'll build one that just duplicates the list that I have below:
(defstruct unit-test :string :function)
Well, that does let me wrap tests into structures, but doesn't exactly let me manipulate them:
user=> (struct unit-test :string "creating a listener" :function test-listener-new)
{:function user.test_listener_new@d5eb7, :string "creating a listener"}
What I'm going to need is a way to build these tests and load them when I load the file, otherwise I'm just making the process of eyeballing my results in the REPL harder on myself.
After a bit of thought, I settle on this as my test list:
(defstruct unit-test :name :string :function)
(def ALL-TESTS {})
(defn unit-tests-add [test]
(def ALL-TESTS
(assoc ALL-TESTS (get test :name) test)))
(defn unit-test-new
([description function]
(unit-tests-add (struct unit-test
:name function
:string description
:function function))))
Nothing special at the moment. Just a simple structure defining a unit test as a name, description and function. Now, let's use that one one of the three rudimentary tests that I already have:
(defn test-listener-new
([]
(test-listener-new DEFAULT-PORT))
([port]
(with-open listener (listener-new port)
(when listener
true))))
(unit-test-new "creating a listener" test-listener-new)
All right. Improving a tiny bit. Except that, after evaluating the file twice, I still have:
user=> ALL-TESTS
{user.test_listener_new@1a0d866 {:function user.test_listener_new@1a0d866, :string "creating a listener", :name user.test_listener_new@1a0d866}, user.test_listener_new@3f96ee {:function user.test_listener_new@3f96ee, :string "creating a listener", :name user.test_listener_new@3f96ee}}
Makes sense, really. My new instance of test-listener-new has a new symbol. So, even though I know that they're the same function, there's no good reason for the compiler to.
What I really want, though, is to make defining a new test as simple
as adding a new (albeit specialised) function, rather than playing
around with remembering to call unit-test-new after. So, rather than
trying to get unit-test-new to parse out the name of the function,
I'll rethink my approach.
What do I actually want? Well, the function, name and description added to my set of tests seamlessiy. I think it's fair to assume that before I'm done, I'll want a few more qualifiers on tests as well. Since I don't know what those are, I won't add them to my structure yet.
Admitting that I need macros...
However, I'm in a conundrum here, because I don't want to add logic to my test definition every time I think of something new. Really, this is starting to sound like a good argument for a macro.
I'll start by just imitating what defn does. Because if I can't
imitate that in a macro, the rest of this is going to start smelling
like week-old moose.
(defmacro deftest [fname description extras & fdecl]
`(defn ~fname ~@fdecl))
So that takes a function name, a descriptive string and a bunch of
unspecified "extras" and then proceeds to ignore the second two before
shoving the function name and the declaration into a defn. The
backtick (`) marks the following list as a template, meaning that the
defn won't be resolved right away.
The ~ and ~@ macro characters inside that template mean,
respectively, to unquote fname (so that I'm not defining a
function called user/fname) and to resolve fdecl into the
sequence of values which it represents.
I have to do this because the & rest argument to an fn is
considered to be a sequence. Were I simply passing it as an unquoted
symbol, I'd end up with an extra set of parentheses around the
function body when it's evaluated, which I don't want.
So, having rationalised every jot and tittle of what I just did, I'm
going to dump test-listener-new - that is to say, a working
function - into deftest via macroexpand-1 and see if it generates a
plausible defn. (macroexpand-1 because I don't really want to see
the full expanion of defn's internals, just this first layer that
I added.
user=> (macroexpand-1 '(deftest test-listener-new "creating a listener" '()
([]
(test-listener-new DEFAULT-PORT))
([port]
(with-open listener (listener-new port)
(when listener
true)))))
(clojure/defn test-listener-new ([] (test-listener-new DEFAULT-PORT)) ([port] (with-open listener (listener-new port) (when listener true))))
And that resulting definition looks just like the definition of
test-listener-new, only on one line and with defn as a
qualified namespace/symbol pair.
Seeing as that worked, it means that all I should have to do is wrap
defining the function in a do and add, as the second half, a
function call adding the test to my list of tests.
(defmacro deftest [fname description extras & fdecl]
`(do (defn ~fname ~@fdecl)
(unit-tests-add (struct unit-test
:name (name '~fname)
:string ~description
:function ~fname
~@extras))))
Which, when expanded, gats me:
user=> (macroexpand-1 '(deftest test-listener-new "creating a listener" '()
([]
(test-listener-new DEFAULT-PORT))
([port]
(with-open listener (listener-new port)
(when listener
true)))))
(do (clojure/defn test-listener-new ([] (test-listener-new DEFAULT-PORT)) ([port] (with-open listener (listener-new port) (when listener true)))) (user/unit-tests-add (clojure/struct user/unit-test :name (clojure/name (quote test-listener-new)) :string "creating a listener" :function test-listener-new quote ())))
Which counts as an almost-but-not-quite. Because I'm quoting the
empty list in the arguments that I'm passing to deftest, it
expands to (quote ()), which is then unquoted to quote ().
Which isn't exactly what I want.
On the other hand, the working syntax:
user=> (macroexpand-1 '(deftest test-listener-new "creating a listener" ()
([]
(test-listener-new DEFAULT-PORT))
([port]
(with-open listener (listener-new port)
(when listener
true)))))
(do (clojure/defn test-listener-new ([] (test-listener-new DEFAULT-PORT)) ([port] (with-open listener (listener-new port) (when listener true)))) (user/unit-tests-add (clojure/struct user/unit-test :name (clojure/name (quote test-listener-new)) :string "creating a listener" :function test-listener-new)))
It works fine, and saves me a spurious quote. Furthermore, values in a
struct default to nil, so if I add more bits to the unit-test
structure later, I don't have to cope with accounting for them in any
way other than doing nothing for nil, and my previously-defined
tests will still work.
Applying these new tests.
So, I modify my test to use this macro and get:
(deftest test-listener-new "creating a listener" ()
([]
(test-listener-new DEFAULT-PORT))
([port]
(with-open listener (listener-new port)
(when listener
true))))
And evaluating that adds it to ALL-TESTS.
user=> ALL-TESTS
{"test-listener-new" {:function user.test_listener_new@1dcc2a3, :string "creating a listener", :returns nil, :name "test-listener-new"}}
I could have put the extras (that part that I have a suspicion
that I'll need, but don't know why yet,) at the end of the deftest
macro. However, that means that I'd likely forget to add them. Also,
it means that I have to make more changes to an existing test function
than simply adding two pieces of information.
On the other hand, because it returns the result of
unit-tests-add, deftest isn't quite a drop-in replacement to
defn yet. Time to get it to return the function instead.
So, knowing the function name, and establishing the reasonable
qualification that the function has been defined (which it should have
been, as defining it is a part of the macro, what I want to return is
the Var named by fname. Which leads me to:
(defmacro deftest [fname description extras & fdecl]
`(do (defn ~fname ~@fdecl)
(unit-tests-add (struct unit-test
:name (name '~fname)
:string ~description
:function ~fname
~@extras))
#'~fname))
Which, when I evaluate my test, returns the test function, ensuring that this is now a wrapper around defn that actually returns the right values.
That done, I can finally get to converting my remaining two tests and
the test-all function. The tests are easy:
(deftest test-byte-array-from-string "string->byte array conversion" ()
([]
(test-byte-array-from-string (current-time)))
([str]
(let [barr (byte-arr-from-string str)
bseq (map (comp char (appl aget barr))
(range (alength barr)))
chseq (map char str)]
(and (== (alength barr)
(count bseq)
(count chseq))
(nil? (first (filter false?
(map eql?
bseq
chseq))))))))
(deftest test-listener-predicates "listener open?/closed? predicates" () [])
To make the testing function work, it needs to be able to get at my vector of tests and to examine the tests.
(def unit-test-name (accessor unit-test :name))
(def unit-test-string (accessor unit-test :string))
(def unit-test-function (accessor unit-test :function))
A side-trip into accessors...
Here, however, I'm noticing that I'm duplicating what's already
written once in my struct, just to have accessors. Also, :string
is a daft name.
So, I'll make :string into :description and generate my
accessors based directly off of the structure.
(map (fn [key] (def (sym (name *current-namespace*)
(strcat "unit-test-" (name key)))
key))
(keys unit-test))
And testing that:
user=> clojure.lang.Compiler$CompilerException: REPL:1026: Second argument to def must be a Symbol
at clojure.lang.Compiler.analyzeSeq(Compiler.java:3065)
at clojure.lang.Compiler.analyze(Compiler.java:3011)
at clojure.lang.Compiler.analyze(Compiler.java:2986)
at clojure.lang.Compiler.access$400(Compiler.java:38)
at clojure.lang.Compiler$BodyExpr$Parser.parse(Compiler.java:2740)
at clojure.lang.Compiler$FnMethod.parse(Compiler.java:2626)
at clojure.lang.Compiler$FnMethod.access$1300(Compiler.java:2540)
at clojure.lang.Compiler$FnExpr.parse(Compiler.java:2327)
at clojure.lang.Compiler.analyzeSeq(Compiler.java:3056)
at clojure.lang.Compiler.analyze(Compiler.java:3011)
at clojure.lang.Compiler.analyze(Compiler.java:2986)
at clojure.lang.Compiler.access$400(Compiler.java:38)
at clojure.lang.Compiler$InvokeExpr.parse(Compiler.java:2255)
at clojure.lang.Compiler.analyzeSeq(Compiler.java:3060)
at clojure.lang.Compiler.analyze(Compiler.java:3011)
at clojure.lang.Compiler.analyze(Compiler.java:2986)
at clojure.lang.Compiler.eval(Compiler.java:3085)
at clojure.lang.Repl.main(Repl.java:59)
Caused by: java.lang.Exception: Second argument to def must be a Symbol
at clojure.lang.Compiler$DefExpr$Parser.parse(Compiler.java:296)
at clojure.lang.Compiler.analyzeSeq(Compiler.java:3058)
... 17 more
Hmm, not so good. Ok, time to poke at what exactly it is that I'm doing wrong here.
user=> (sym "user" "a")
user/a
user=> (def (sym "a") 1)
clojure.lang.Compiler$CompilerException: REPL:1030: Second argument to def must be a Symbol
at clojure.lang.Compiler.analyzeSeq(Compiler.java:3065)
at clojure.lang.Compiler.analyze(Compiler.java:3011)
at clojure.lang.Compiler.analyze(Compiler.java:2986)
at clojure.lang.Compiler.eval(Compiler.java:3085)
at clojure.lang.Repl.main(Repl.java:59)
Caused by: java.lang.Exception: Second argument to def must be a Symbol
at clojure.lang.Compiler$DefExpr$Parser.parse(Compiler.java:296)
at clojure.lang.Compiler.analyzeSeq(Compiler.java:3058)
... 4 more
user=> (instance? clojure.lang.Symbol (sym "user" "a"))
clojure.lang.Compiler$CompilerException: REPL:3: Unable to resolve classname: clojure.lang.PersistentList@d165fe67
at clojure.lang.Compiler.analyzeSeq(Compiler.java:3065)
at clojure.lang.Compiler.analyze(Compiler.java:3011)
at clojure.lang.Compiler.analyze(Compiler.java:2986)
at clojure.lang.Compiler.eval(Compiler.java:3085)
at clojure.lang.Repl.main(Repl.java:59)
Caused by: java.lang.IllegalArgumentException: Unable to resolve classname: clojure.lang.PersistentList@d165fe67
at clojure.lang.Compiler$InstanceExpr$Parser.parse(Compiler.java:1868)
at clojure.lang.Compiler.analyzeSeq(Compiler.java:3058)
... 4 more
So, it appears that both def and instance? are seeing the
unexpanded list before it gets turned into a symbol. Curiouser and
curiouser.
user=> (map (fn [key] (let [my-sym (sym (name *current-namespace*)
(strcat "unit-test-" (name key)))]
my-sym))
(keys unit-test))
(user/unit-test-name user/unit-test-function user/unit-test-description)
user=> (map (fn [key] (let [my-sym (sym (name *current-namespace*)
(strcat "unit-test-" (name key)))]
(def my-sym 1)))
(keys unit-test))
(#<Var: user/my-sym> #<Var: user/my-sym> #<Var: user/my-sym>)
Ok, so I redefined my-sym three times. After I got as far as:
(map (fn [li] (def ~@li))
(map (fn [key] (list (sym (name *current-namespace*)
(strcat "unit-test-" (name key)))
(accessor unit-test key)))
(keys unit-test)))
I've decided that I'll no longer make a big deal out of building my
accessors from my structure, as I seem to have a merry clash between
what def wants and what I know how to offer to it.
I'll admit that this failure irks me, but I'm going to leave it as something to poke at later, as I'm getting confused as to operator and macro precedence.
Sobeit:
(def unit-test-name (accessor unit-test :name))
(def unit-test-description (accessor unit-test :description))
(def unit-test-function (accessor unit-test :function))
Giving up and going back to the test function.
Now, on to making the test function actually work with this structure, rather than playing with trying to be clever with generating accessors.
(defn test-all []
(loop [test-list (vals ALL-TESTS)
failure false]
(let [this-test (first test-list)
test-list (rest test-list)]
(if (not this-test)
(if failure
(println "---\nSome tests failed.")
(println "---\nAll tests succeeded."))
(let [test-result (time (unit-test-function this-test))]
(println "Testing" (unit-test-description this-test) ":" test-result
(if (first test-list) "\n" ""))
(recur test-list
(when (or failure
(not test-result))
However, testing that, it shows only that the unit test functions exist. Nothing more.
user=> (test-all)
"Elapsed time: 0.181588 msecs"
Testing creating a listener : user.test_listener_new@1878144
"Elapsed time: 0.028216 msecs"
Testing string->byte array conversion : user.test_byte_array_from_string@137d090
"Elapsed time: 0.019277 msecs"
Testing listener open?/closed? predicates : user.test_listener_predicates@15db314
---
All tests succeeded.
nil
I need it to evaluate the returned function, preferably with the capacity to insert arguments as needed. Hmm.
(defn test-all []
(loop [test-list (map (fn [x] (list (unit-test-description x)
(unit-test-function x)))
(vals ALL-TESTS))
failure false]
(let [test (first test-list)
test-list (rest test-list)]
(if (not test)
(if failure
(println "---\nSome tests failed.")
(println "---\nAll tests passed."))
(let [test-result (time (eval (list (second test))))]
(println "Testing" (first test) ":" test-result)
(recur test-list
(when (or (not test-result)
failure)
true)))))))
Will leave that as a working test framework for the moment and actually move back to writing tests.
(deftest test-listener-predicates "listener open?/closed? predicates" ()
([]
(test-listener-predicates DEFAULT-PORT))
([port]
(let [listener (listener-new port)
tests (and (not (listener-closed? listener))
(listener-open? listener))]
(. listener (close))
(and tests
(not (listener-open? listener))
(listener-closed? listener)))))
(deftest test-listener-close "closing a listener" ()
([]
(let [listener (listener-new DEFAULT-PORT)]
(and (listener-open? listener)
(not (listener-close listener))
(listener-closed? listener)))))
(deftest test-connection-new "creating a connection" ()
([]
(let [listener (listener-run-in-background)
connection (connection-new)]
(and (connection-new)
(not (listener-close listener))
(not (connection-new))))))
(deftest test-connection-run "running a complete connection" ()
([]
(let [listener (listener-run-in-background)
result (connection-run)]
(and (listener-open? listener)
(not (listener-close listener))
(listener-closed? listener)
(> 0 (. result (length)))
(== 0 (. (connection-run) (length)))))))
So there's my complete set of tests to date. Which I can then without
changing the test-all that I had already defined.
user=> (test-all)
"Elapsed time: 11.890338 msecs"
Testing creating a listener : true
Could not connect to 127.0.0.1 on port 51345
"Elapsed time: 1194.393981 msecs"
Testing creating a connection : true
"Elapsed time: 4.478223 msecs"
Testing string->byte array conversion : true
"Elapsed time: 35.4397 msecs"
Testing running a complete connection : false
"Elapsed time: 11.453132 msecs"
Testing closing a listener : true
"Elapsed time: 13.804548 msecs"
Testing listener open?/closed? predicates : true
---
Some tests failed.
nil
Ok, so I notice two things here. One is that every test works except what should be the last one. The other is that, well, it isn't the last one. In fact, the tests are in no particular order when, in fact, they should have a certain level of ordering in them.
Setting up after statements...
Sounds like I finally have a use for that extras argument that,
until now, I haven't been using.
(defstruct unit-test :name :description :function :after)
(def unit-test-after (accessor unit-test :after))
(deftest test-listener-predicates "listener open?/closed? predicates"
(:after "test-listener-new")
([]
(test-listener-predicates DEFAULT-PORT))
([port]
(let [listener (listener-new port)
tests (and (not (listener-closed? listener))
(listener-open? listener))]
(. listener (close))
(and tests
(not (listener-open? listener))
(listener-closed? listener)))))
(deftest test-listener-close "closing a listener"
(:after "test-listener-predicates")
([]
(let [listener (listener-new DEFAULT-PORT)]
(and (listener-open? listener)
(not (listener-close listener))
(listener-closed? listener)))))
(deftest test-connection-new "creating a connection"
(:after "test-listener-close")
([]
(let [listener (listener-run-in-background)
connection (connection-new)]
(and (connection-new)
(not (listener-close listener))
(not (connection-new))))))
(deftest test-connection-run "running a complete connection"
(:after :all)
([]
(let [listener (listener-run-in-background)
result (connection-run)]
(and (listener-open? listener)
(not (listener-close listener))
(listener-closed? listener)
(> 0 (. result (length)))
(== 0 (. (connection-run) (length)))))))
There. Now tests that should have sequence can have them. But this means that I need to actually extract my function for generating the list of unit tests and make it respect the rules that I just added.
(defn unit-test-list
([]
(map (fn [x] (list (unit-test-description x)
(unit-test-function x)))
(vals ALL-TESTS))))
Which gives me the same result for test-all. Now, to sort this
data rather than just dropping it in a list.
(defn unit-test-list-helper [unsorted sorted]
(let [test (first unsorted)
unsorted (rest unsorted)]
(cond (or (not (unit-test-after test))
(and (eql? :all (unit-test-after test))
(not unsorted))
(first (filter (fn [x] (eql? (unit-test-name x)
(unit-test-after test)))
unsorted)))
(list unsorted
(concat sorted
(list test)))
:t
(list (concat unsorted
(list test))
sorted))))
So what that's supposed to do is run through the unsorted list, adding things to the sorted list when they either have no after statement or their after statement is met.
Now, I'll bind that helper into a loop:
(defn unit-test-list
([]
(cond (rest (filter (fn [test] (eql? :all
(unit-test-after test)))))
(do (println "Error: Only one test may be marked as"
"coming after all others.")
[])
:t
(unit-test-list (vals ALL-TESTS) (list))))
([unsorted sorted]
(if (not (first unsorted))
(map (fn [test] (list (unit-test-description test)
(unit-test-function test)))
sorted)
(let [helped-list (unit-test-list-helper unsorted sorted)
unsorted (first helped-list)
sorted (second helped-list)]
(recur unsorted sorted)))))
And running it:
user=> (unit-test-list (vals ALL-TESTS) nil)
It hangs.
Stepping through the helper function in a long series of examinations
tells me that it's hanging at the last step. Then, after changing it
to reflect my actual intent (I typoed sorted as unsorted. I
start to think about whether this is actually a good way to build a
list. After all, it will take up to the factorial of the length of
the list of tests to actually build it.
I poke with comparators for a bit and find that my somewhat fuzzy requirements don't exactly meet comparator's exacting demands2. Then I decide to revisit my iffy list function, but move blocks of tests at a time.
(defn unit-test-list-helper [unsorted sorted]
(let [nils (filter (comp not unit-test-after)
unsorted)
alls (filter (comp (appl eql? :all) unit-test-after)
unsorted)
others (filter (fn [t] (not-any? (fn [x] (eql? (unit-test-after t)
(unit-test-after x)))
(concat nils alls)))
unsorted)
in-sorted (fn [t] (some (fn [x] (eql? (unit-test-name x)
(unit-test-after t)))
(concat nils sorted)))]
(cond (first nils)
(list (concat alls
(filter (complement in-sorted)
others))
(concat nils
(filter in-sorted others)))
(== (count alls)
(count unsorted))
(list nil
(concat sorted alls))
:t
(list (concat alls
(filter (complement in-sorted)
others))
(concat sorted
(filter in-sorted others))))))
This one takes the unsorted list, breaks it into three parts, and
moves what it can over to sorted at each step. It sorts my list
of functions in three steps, rather than twenty. However, those steps
are relatively expensive. I might as well compare the two functions'
performances while I've them both on my screen.
user=> (do (dotimes x 10 (time (unit-test-list-old))) (println "----------") (dotimes x 10 (time (unit-test-list))))
"Elapsed time: 3.240635 msecs"
"Elapsed time: 0.478832 msecs"
"Elapsed time: 0.459835 msecs"
"Elapsed time: 0.713778 msecs"
"Elapsed time: 0.462908 msecs"
"Elapsed time: 0.450616 msecs"
"Elapsed time: 0.433575 msecs"
"Elapsed time: 0.506489 msecs"
"Elapsed time: 0.453689 msecs"
"Elapsed time: 5.946846 msecs"
----------
"Elapsed time: 8.428725 msecs"
"Elapsed time: 1.182832 msecs"
"Elapsed time: 1.732902 msecs"
"Elapsed time: 1.130031 msecs"
"Elapsed time: 1.121931 msecs"
"Elapsed time: 1.130869 msecs"
"Elapsed time: 1.137016 msecs"
"Elapsed time: 1.390959 msecs"
"Elapsed time: 1.163555 msecs"
"Elapsed time: 1.132546 msecs"
Interesting. The old one actually did better than the new. Now, I could count their operations, but it would be more fun to get the REPL testing this for me.
user=> (dotimes x 100 (eval `(deftest ~(gensym) "generated fake test" (:after nil) [] true)))
There. Made a hundred test macros with no structure to them.
gensym just makes a symbol with a guaranteed-unique name. That
ensures that, in generating these tests, I don't have to first come up
with my own means to make unique nmes.
Now to try again:
user=> (do (dotimes x 10 (time (unit-test-list-old))) (println "----------") (dotimes x 10 (time (unit-test-list))))
"Elapsed time: 108.745944 msecs"
"Elapsed time: 44.778876 msecs"
"Elapsed time: 38.915002 msecs"
"Elapsed time: 47.836247 msecs"
"Elapsed time: 41.699434 msecs"
"Elapsed time: 40.098393 msecs"
"Elapsed time: 41.917059 msecs"
"Elapsed time: 40.536157 msecs"
"Elapsed time: 39.040995 msecs"
"Elapsed time: 39.437135 msecs"
----------
"Elapsed time: 21.603863 msecs"
"Elapsed time: 17.80338 msecs"
"Elapsed time: 17.744992 msecs"
"Elapsed time: 19.674568 msecs"
"Elapsed time: 13.584687 msecs"
"Elapsed time: 19.662834 msecs"
"Elapsed time: 17.736891 msecs"
"Elapsed time: 18.160967 msecs"
"Elapsed time: 13.494174 msecs"
"Elapsed time: 16.875608 msecs"
A gap is starting to form, I think. What about adding some test macros that do rely on other tests?
user=> (import '(java.util Random))
nil
user=> (def RNG (new Random))
#<Var: user/RNG>
user=> (. RNG (nextInt))
Reflection warning, line: 948 - call to nextInt can't be resolved.
1410779829
user=> `(deftest ~(gensym) "z" (:after nil) [] true))
user=> `(deftest ~(gensym) "z" (:after nil) [] true)
(user/deftest G__2659 "z" (:after nil) [] true)
user=> `(deftest ~(gensym) "z" (:after ~(let [keys (keys ALL-TESTS)] (first (drop (rem (. RNG (nextInt)) (count keys)) keys)))) [] true)
Reflection warning, line: 951 - call to nextInt can't be resolved.
(user/deftest G__2665 "z" (:after "G__2491") [] true)
user=> (dotimes x 1000 (eval `(deftest ~(gensym) "z" (:after ~(let [keys (keys ALL-TESTS)] (first (drop (rem (. RNG (nextInt)) (count keys)) keys)))) [] true)))
So, that adds a thousand tests in that do follow a structure, as
they all have an after statement this time.
And I run the test again ...
And I go get coffee ...
5 minutes...
It seems to be still running...
Maybe a thousand was a bad seed...
Oh, there it is:
user=> (do (dotimes x 10 (time (unit-test-list-old))) (println "----------") (dotimes x 10 (time (unit-test-list))))
"Elapsed time: 21438.660779 msecs"
"Elapsed time: 24259.176236 msecs"
"Elapsed time: 20528.833693 msecs"
"Elapsed time: 20170.246777 msecs"
"Elapsed time: 23642.198659 msecs"
"Elapsed time: 20390.313015 msecs"
"Elapsed time: 19931.102975 msecs"
"Elapsed time: 22232.556093 msecs"
"Elapsed time: 21692.653954 msecs"
"Elapsed time: 20286.386119 msecs"
----------
"Elapsed time: 5885.515896 msecs"
"Elapsed time: 7089.577027 msecs"
"Elapsed time: 6119.980053 msecs"
"Elapsed time: 6135.949681 msecs"
"Elapsed time: 6105.716229 msecs"
"Elapsed time: 6035.137985 msecs"
"Elapsed time: 6120.137894 msecs"
"Elapsed time: 5858.970903 msecs"
"Elapsed time: 5882.34203 msecs"
"Elapsed time: 6120.462796 msecs"
So, definitely, as the structure gets more complicated, the slightly more sensible approach is pulling ahead.
But just for fun, as I'm going to bed:
user=> #<Var: user/ALL-TESTS>
user=> (dotimes x 100 (eval `(deftest ~(gensym) "generated fake test" (:after nil) [] true)))
nil
user=> (dotimes x 100000 (eval `(deftest ~(gensym) "generated fake test" (:after ~(let [keys (keys ALL-TESTS)] (first (drop (rem (. RNG (nextInt)) (count keys)) keys)))) [] true)))
Reflection warning, line: 957 - call to nextInt can't be resolved.
(do (dotimes x 10 (time (unit-test-list-old))) (println "----------") (dotimes x 10 (time (unit-test-list))))
Ok, somewhere before generating a 100000-length tree of tests, it crashed, due to a lack of symbols. Fair enough. That test was just waving things around to see if I can.
clojure.lang.Compiler$CompilerException: REPL:749: PermGen space
user=> (count (keys ALL-TESTS))
42577
Revisiting generating my accessors.
However, going back one step, all that silly mucking around with
gensyms and defines gives me an idea:
(map (fn [key] (eval `(def ~(sym (name *current-namespace*)
(strcat "unit-test-"
(name key)))
(accessor unit-test ~key))))
(keys unit-test))
There. Now I know that, should I later decide to add more keys to
that structure, the accessors will be there and waiting for me.
Except that, in a freshly-loaded REPL (with this file loaded via
load-file rather than dumping it in, I find that my accessors are
no longer loaded.
All right, I'll take the hint, stop picking at this, and leave them as normal functions rather than generated ones.
Revisiting actually running the tests
So, I try running all my tests again. And the test function (which I haven't changed since I started that little digression into sorting my tests) still does what it's told, albeit with a tiny wart and a failed test.
user=> (test-all)
"Elapsed time: 306.707138 msecs"
Testing creating a listener : true
"Elapsed time: 216.1839 msecs"
Testing string->byte array conversion : true
"Elapsed time: 11.579405 msecs"
Testing listener open?/closed? predicates : true
"Elapsed time: 10.170846 msecs"
Testing closing a listener : true
Could not connect to 127.0.0.1 on port 51345
"Elapsed time: 1064.018472 msecs"
Testing creating a connection : true
"Elapsed time: 46.276552 msecs"
Testing running a complete connection : false
---
Some tests failed.
And here's the offending test. I'll step through it one bit at a time and see what's going wrong in actuality.
(deftest test-connection-run "running a complete connection"
(:after :all)
([]
(let [listener (listener-run-in-background)
result (connection-run)]
(and (listener-open? listener)
(not (listener-close listener))
(listener-closed? listener)
(> 0 (. result (length)))
(== 0 (. (connection-run) (length)))))))
user=> (def listener (listener-run-in-background))
#<Var: user/listener>
user=> (def result (connection-run))
#<Var: user/result>
user=> (listener-open? listener)
true
user=> (listener-close listener)
nil
user=> (listener-closed? listener)
true
user=> (> 0 (. result (length)))
Reflection warning, line: 306 - call to length can't be resolved.
false
user=> (. result (length))
Reflection warning, line: 307 - call to length can't be resolved.
28
user=> (> (. result (length)) 0)
Reflection warning, line: 308 - call to length can't be resolved.
true
Ok, so I messed up the ordering of greater-than and less-than. I find
that I do this a lot in Lisp, because of how I read (> 0 ...
mentally. Namely, as a single function, testing if what follows is
greater than the integer that I've put there. Or, in other words,
exactly backwards.
So, change that to (> (. result (length)) 0) and re-run the test
function:
user=> (test-all)
java.lang.NullPointerException
at clojure.lang.Reflector.invokeInstanceMethod(Reflector.java:24)
at user.test_connection_run.invoke(Unknown Source)
at clojure.lang.AFn.applyToHelper(AFn.java:171)
at clojure.lang.AFn.applyTo(AFn.java:164)
at clojure.lang.Compiler$InvokeExpr.eval(Compiler.java:2213)
at clojure.lang.Compiler.eval(Compiler.java:3086)
at clojure.eval.invoke(boot.clj:635)
at user.test_all.invoke(Unknown Source)
at clojure.lang.AFn.applyToHelper(AFn.java:171)
at clojure.lang.AFn.applyTo(AFn.java:164)
at clojure.lang.Compiler$InvokeExpr.eval(Compiler.java:2213)
at clojure.lang.Compiler.eval(Compiler.java:3086)
at clojure.lang.Repl.main(Repl.java:59)
"Elapsed time: 9.756547 msecs"
Testing creating a listener : true
"Elapsed time: 4.988344 msecs"
Testing string->byte array conversion : true
"Elapsed time: 26.513984 msecs"
Testing listener open?/closed? predicates : true
"Elapsed time: 10.239011 msecs"
Testing closing a listener : true
Could not connect to 127.0.0.1 on port 51345
"Elapsed time: 997.681828 msecs"
Testing creating a connection : true
Could not connect to 127.0.0.1 on port 51345
Erk. All right, that's getting a bit odd. Changing it back gets me
the previous, broken test, but that's not exactly helpful. Looking at
that dump, I can see that, first off, the error happened in
test-connection-run, but, secondly, it happened when trying to
invoke an instance method.
Further, on that line, the only one I've been changing, there is indeed an instance method. However, on a successful connection, even one with no data, it should return an empty string.
The answer here lies with the next line.
user=> (== 0 (. (connection-run) (length)))
Reflection warning, line: 894 - call to length can't be resolved.
java.lang.NullPointerException
at clojure.lang.Reflector.invokeInstanceMethod(Reflector.java:24)
at clojure.lang.Compiler$InstanceMethodExpr.eval(Compiler.java:950)
at clojure.lang.Compiler$InvokeExpr.eval(Compiler.java:2212)
at clojure.lang.Compiler.eval(Compiler.java:3086)
at clojure.lang.Repl.main(Repl.java:59)
Could not connect to 127.0.0.1 on port 51345
Before, the failure at the successful length was causing and to stop and return false, in a "short-circuiting" behaviour that's fairly normal3.
Now, what that reminds me is that (connection-run) is going to
return nil when it can't open a connection at all. So thus, I'm
calling (length) on nil: (. nil (length)) which,
deservedly, throws an error. So, in this case, the reflection
warnings about length not being resolved were helping me rather
than nagging.
(defn #^Int length-of-string [#^String string]
(if string
(. string (length))
0))
user=> (length-of-string "asdf")
4
user=> (length-of-string nil)
0
(deftest test-connection-run "running a complete connection"
(:after :all)
([]
(let [listener (listener-run-in-background)
result (connection-run)]
(and (listener-open? listener)
(not (listener-close listener))
(listener-closed? listener)
(<= 0 (length-of-string result))
(== 0 (length-of-string (connection-run)))))))
user=> (test-all)
"Elapsed time: 75.76773 msecs"
Testing creating a listener : true
"Elapsed time: 3.349029 msecs"
Testing string->byte array conversion : true
"Elapsed time: 9.635583 msecs"
Testing listener open?/closed? predicates : true
"Elapsed time: 9.517131 msecs"
Testing closing a listener : true
Could not connect to 127.0.0.1 on port 51345
"Elapsed time: 944.630393 msecs"
Testing creating a connection : true
Could not connect to 127.0.0.1 on port 51345
"Elapsed time: 1001.659708 msecs"
Testing running a complete connection : true
---
All tests passed.
And, testing all of that, it does indeed work out the way it ought to, except for the aforementioned wart. To point it out, "Could not connect to 127.0.0.1 on port 51345" would appear to indicate an error, whereas I know that it's actually a valid part of both the tests for which it appears.
So, here's the problem: those errors are useful rather than throwing an exception when connecting manually, but they give the wrong indication (to me at least) when connecting automatically.
So, what I'd like is to shove any messages generated into something other than standard output, where I can inspect them if I so choose.
(defn test-all []
(let [test-out (new StringWriter)]
(loop [test-list (unit-test-list)
failure false]
(let [test (first test-list)
test-list (rest test-list)]
(cond (not test)
(do (if failure
(println "---\nSome tests failed.")
(println "---\nAll tests passed."))
(list failure test-out))
:t
(let [test-result (time (binding [*out* test-out]
(eval (list (second test)))))]
(println "Testing" (first test) ":" test-result)
(recur test-list
(when (or (not test-result)
failure)
true))))))))
So, what that does is, before doing anything, creates a StringWriter outside the loop. Then, when it comes time to perform the test, temporarily re-binds out (the variable telling Clojure where to print to) to that StringWriter.
This means, now, that I can return the success/failure of the set of tests, as well as any error messages, as a list.
user=> (def test-results (test-all))
"Elapsed time: 8.808941 msecs"
Testing creating a listener : true
"Elapsed time: 3.364394 msecs"
Testing string->byte array conversion : true
"Elapsed time: 8.342401 msecs"
Testing listener open?/closed? predicates : true
"Elapsed time: 63.791348 msecs"
Testing closing a listener : true
"Elapsed time: 982.201928 msecs"
Testing creating a connection : true
"Elapsed time: 1002.468191 msecs"
Testing running a complete connection : true
---
All tests passed.
#<Var: user/test-results>
user=> test-results
(nil Could not connect to 127.0.0.1 on port 51345
Could not connect to 127.0.0.1 on port 51345
)
Afterthoughts
So, now I have a very basic (albeit ostensibly extensible) testing framework, as well as a setup that generates that framework automatically.
So, now a few (code-dump-free) thoughts as I actually make sure that my in-file commentary is up to date.
Mistakes
What are the current downsides to this system and this approach?
Well, for starters, the test framework only recognises nil and
true. This means that, when an early test manages to hang and
throw an exception, it brings down the test framework as well.
In laziness, I chose to use return values in order to not have to play too much with caught/thrown errors, and instead passed truth/falsity around. Not necessarily the best approach, but I haven't decided whether throwing/catching is better in this case5.
Also, I'll be the first to admit that I'm handling errors in a bit of
a cheap way, and one that, were I actually turning this into a real
component, rather than something that I'm building as the "build one
to throw away" of my learning process, I'd have started to question at
about the point that I was wrapping a binding around println
in order to isolate my error handling away from my testing function.
Further, the 100 lines defining my simple testing framework should really be extracted from this client-server application. They're only loosely attached to each other, so I should be able to give them their own namespaces with minimal hassle. (I'll wait for the next Clojure release to do that, though, because I know I'll have to change a bunch in order to handle upcoming changes, and would prefer to discuss namespaces with myself once the new system is in.)
Lessons
On contrast, what have I learned? Well, for one, do not try to generate 17 000 lines of Lisp at once via an elisp command. Or, at least, save your document first. (I lost all of my poking at comparators via that gaffe.)
Also, that macros really aren't especially terrifying. Believe me or
don't, but deftest was the first Lisp macro that I've ever
written. I'm still tripping over order of operations and how forms
get expanded and names get resolved, especially when dealing with
things like def and load_file, but I do think that that falls
simultaneously with me trying to be too clever and not actually
understanding what it is that I'm doing.
As I write more, I keep finding new boot.clj functions that let me
write a verbose expression a lot more succinctly and clearly. My new
ones are with-open, some, not-any? and anything beginning
with sort.
I'm finding that having the manual as a single, indexed document is making me try harder to use Clojure's functions for doing something, rather than rolling my own off of Java's library.
As I've found before, having a single unified environment in which to write code, then evaluate it selectively is a great asset. It means, for me at least, that I spend less time having to mentally page-swap as I try to remember what I was going to do next.
There's some caveats to that, though: Number one is that my current environment state doesn't necessarily match what I have written down. I found myself, this session, killing by REPL on occasion just to make sure that it was matching my work as exactly as possible.
Also, it makes me lazy about making sure that, e.g., functions are declared before another function references them. Which works just fine, right up until I try to load the file and realise that my selective evaluation has (yet again) created a file that needs minor reordering in order to load.
But that's a trivial irritation. And far outweighed by being able to write this (as HTML-heavy Markdown), manipulate the actual source of this program and run the REPL, all in the same environment, and all sharing data6.
Future / Goals
Well, beyond the nebulous goals I dropped at the end of my initial look, I now have a few more.
Cease using
nilas an error value.Move to separate test / application namespaces.
Look at existing functions that do the same thing (the
closes andlength-of-stringcome to mind) and push them into multimethods instead.(Yes, the long-term geal here is to meander through all 21 chapters of the manual as I find needs.)
Explore wrapping an extant Java unit testing facility in Clojure rather than rolling my own (a nice learning exercise but not exactly a valid solution to anything beyond making myself try out the language.
Ok, it sounds like a fine idea for a project, but I'm trying not to let my focus wander all over the place, so I'll keep this experiment/application self-contained. Back
To clarify my failure to use comparators a little bit, a comparator is an object/function that grabs some items, compares them, and replies which one is greater.
user=> (sort (comparator >) [5 4 8 4 3 8 4 6]) (8 8 6 5 4 4 4 3) user=> (sort (comparator (fn [x y] (println x y (> x y)) >)) [5 4 8 4 3 8 4 6]) 5 4 true 4 8 false 8 4 true 3 8 false 8 4 true 4 6 false 4 3 true (5 4 8 4 3 8 4 6) user=> (sort (comparator (fn [x y] (println x y (>= x y)) >)) [5 4 4 4]) 5 4 true 4 4 true 4 4 true (5 4 4 4)Here's where that falls apart for my purposes, though: when sorting numbers, letters, names, etc., I know the relative ordering of any two. On the other hand, with these tests, unless one of four conditions is met, the ordering of the two items is unknown.
:afteris nil. The test comes before all others.:afteris:all. The test comes after all others.Both tests have the same
:after. They are equivalent.One test's
:nameis the other test's:after. They have to go in that order.
My problem is that most of my comparisons do not meet these standards. Hence my sort functions both having a means to defer looking at an item until a condition is met. Back
This meaning, in a logical condition, to stop evaluating the condition as soon as its truth / falsity becomes known. Here, and in other tests, I was using it as somewhat of a shorthand to say, "If the test fails at any point, the entire test has failed."
On the other hand, using logical predicates (
and,or, etc.) as control structure can quickly get unreadable at a glance.(or (or (and (test1) (test2)) (test3)) (or (and (test4) (test5) (test6)) (and (test6) (test7) (or (test8) (test8a) (test8b))) (test9)))A contrived example, sure, but I lost the flow of that logical tree midway through writing the test. I also tried to devise it so that the tree structure would bear at least a passing resemblance to something that had been modified to deal with a later condition4 Back
(For what it's worth, it says: Perform test1. On success, perform test2. On success of test1 and test2, return success. Otherwise, perform test3. On success of test3, return success. On failure of test3, try test4, test5, test6, stopping if there's failure. And so on, until, if all other tests have failed, return the success/failute of test9.) Back
Yes, I'm aware that the consistent (and possibly even correct) answer is throw/catch. However, for the purposes of a simple demo application, building Throwables to toss around strikes me as an unnecessarily obfuscating the mechanics of what I'm doing. Back
Emacs, 164 characters wide, divided into two columns, with a full column devoted to the REPL, 20 lines to the source and 40 to this text. Which raises a question: With the admonition to not write any function longer than a single screen, with whose screen length?
For the record, the longest function in this example is 28 lines and the shortest is 1 line long. That's likely a direct consequence to my having kept my source scrunched up with only a little window into it7. Back
-
(save-excursion (goto-char (point-min)) (re-search-forward "^ *$" (point-max) nil) (message (mapconcat (lambda (lc) (format "%d" lc)) (let ((lcount nil)) (while (not (eobp)) (forward-sexp) (setq lcount (append lcount (list (count-lines (save-excursion (backward-sexp) (point)) (point)))))) lcount) " ")))
And that's why Emacs one-liners are scary. Because before you know it, they're actually 15 lines long, all scrunched into an Eval: prompt. Back
Subscribe to:
Posts (Atom)