|
|
|
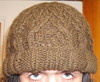
This hat is based around a simple pattern of twists, creating a
design that spirals around the crown. The goal was to make a hat
simple enough to knit without a pattern (on a bus ride) while still
being more interesting than simply knitting stockingette forever and
ever.
Casting on
Cast on a multiple of 6 stitches. I used 120 stitches on 5.5mm
needles to give a fairly loose fit. Join without twisting and mark
the beginning of the round.
Brim
- Knit 10 rounds of k1, p1 rib. (k1, p1, repeat to the end of
the round.)
- Knit 2 rounds of stockingette (knit stitch).
- Knit 9 rounds of k1, p1 rib.
Crown
The crown is made up of twists, followed by ribbing. On each row
of twists, move any markers one stitch to the right. This means
that, rather than purling the last stitch of the round before a
round of twists, you instead twist it with the first statch of the
next round.
- Move marker one stitch right. RT (knit into the second stitch
on the left needle and, without removing the stitch from the
needle, knit into the first stitch, removing both stitches from
the left needle.) Repeat, twisting every two stitches together
until the end of the round.
- k1, p1, repeat to the end of the round.
- k1, p1, repeat to the end of the round.
Repeat these three rows four times.
- Move marker one stitch right. RT until the end of the round.
- k1, p1 to the end of the round.
Repeat these two rows four times.
- Move marker one stitch right. RT until the end of the round.
- Remove the marker, slip the last stitch on the right needle
onto the left needle and place the marker on the right needle. RT
until the end of the round.
Decreasing
If you are using circular needles, when it becomes uncomfortable
to knit the smaller rounds here, switch to double-pointed needles.
- k1, p1, k1, p1, k2tog, repeat to the end of the round.
- k1, p1, k1, p1, k1, repeat to the end of the round.
- k1, p1, k1, p1, k1, repeat to the end of the round.
- k1, p1, p2tog, k1, repeat to the end of the round.
- k1, p2, k1, repeat to the end of the round.
- k1, p2, k1, repeat to the end of the round.
- Move marker one stitch right. k2tog, p2, repeat to the end of
the round.
- k1, p2, repeat to the end of the round.
- k1, p2, repeat to the end of the round.
- k1, p2tog, repeat to the end of the round.
- k1, p1, repeat to the end of the round.
- k1, p1, repeat to the end of the round.
- k2tog, repeat to the end of the round.
- k1 to the end of the round.
- k1 to the end of the round.
At this point, the hat has 1/6 of the original number of
stitches. On a 120-stitch hat, this left me with 20 stitches.
Repeat the last three rounds until you have ten stitches or fewer,
then cut your yarn, draw the tail through the remaining loops and
pull tight.
Someday, I'm going to learn to knit tiny swatches. The first one I did for this hat was enormous, the size of a tea towel, but highlighted more than a few mistakes that I was making.
Luckily, the cable pattern is composed of repeated motifs. So, seeing these motifs work once was enough to know how they work throughout.
Unfortunately, my first sketch for the lace pattern was done somewhat foolishly. I believed that I could guess, from the pattern, what it would look like, conveniently forgetting that lace isn't just a pattern of holes: it also relies on a structure of slanted and upright stitches.
What I'm trying to say is that my first sketch was uglier than ugly. I've revised it now, and on paper, it looks nice. In practice, I don't know. So I'm doing the sensible thing this time and knitting it again.
There needs to be a pattern to the decreases anyhow, and I've no idea what that'll be. Thus, he sensible thing is 30 rows of swatch, a lifeline and then some puzzling out what decreases go where.

I've made a little change to the instructions: In decreasing the ribbing, I said to p1, s1, psso. That's not really possible. I meant to say s1, p1, psso.
Also, I noticed that the pattern was written with my old method of typing stitches into a spreadsheet. Since then, I've set up Inkscape with a template SVG document that does a far far better job at giving me good-looking knitting patterns.
So, while updating the PDF for the dogwood cabled hat, I added in a proper graphical pattern, which looks far far prettier than the previous ASCII-art one.

Well, after six attempts at the brim and two test-knits plus one failed attempt at the body, this hat came together.
It began as a simple concept: I wanted to make a hat that had a single braid pattern running around the brim. From that, form ollowed design. I knew that I'd have to graft the brim into a loop and pick up stitches.
That said, when starting, I noted grafting as something that I'd have to learn and had no clue what pattern I'd attach to the body of the hat. In the end, I failed at grafting but learned a lot and ended up knitting four patterns for the body before finding one that wasn't overwhelming.
The hat itself has the shift in density that I wanted, though. Around the ears, the fabric is thick, dense and warm. Atop the head, it flates out just slightly and sits loosely on my hair, hopefully preventing it from getting tangled and staticked by the hat.
Requirements
- 150-175 metres of worsted weight yarn, preferably in two colours.
- 4mm straight needles.
- 6mm circular needles and/or double-pointed needles.
- Circular or double-pointed needles in a size smaller than 4mm.
- A tapestry or sewing needle with an eye large enough to accommodate worsted weight yarn.
Instructions
Brim
Casting on
Cast on onto 4mm straight needles using a crocheted provisional cast-on of 22 stitches. Crochet a chain, placing the yarn behind a needle after every crochet stitch and pulling it through the loop on the hook such that it wraps around the needle. Chain a few more stitches and then pull the yarn through the loop. This gives a provisional cast-on that can be easily undone later on.
Knit the following pattern (brim chart):
- (wrong side) p2, k2, p6, k2, p6, k4
- (right side) p4, k4, c2l, c2r, k4, p2, k2
- p2, k2, p4, k1, p4, k1, p4, k4
- p4, c2x2l, p1, c2x2r, p1, c2x2r, p2, k2
- p2, k2, p4, k1, p4, k1, p4, k4
- p4, k4, c2r, c2l, k4, p2, k2
- p2, k2, p6, k2, p6, k4
- p4, k2, c2x2r, p2, c2x2l, k2, p2, k2
- p2, k2, p6, k2, p6, k4
- p4, k4, c2l, c2r, k4, p2, k2
- p2, k2, p4, k1, p4, k1, p4, k4
- p4, c2x2l, p1, c2x2l, p1, c2x2r, p2, k2
- p2, k2, p4, k1, p4, k1, p4, k4
- p4, k4, c2r, c2l, k4, p2, k2
- p2, k2, p6, k2, p6, k4
- p4, k2, c2x2r, p2, c2x2l, k2, p2, k2
Note here that the only difference between rows 1-8 and rows 9-16 is that on lines 4 and 12, the centre cable slants the opposite way.
Knit this pattern until, at the end of a set of 16 rows, the flat band that you are knitting is large enough to fit around the ears. Knit row 1 again. Cut the yarn, leaving a 1 metre long tail.
Grafting
Untie the knot at the end of your crochet chain and tug on the tail of yarn to undo it. As it releases stitches, pick them up on your free needle. The stitches may be slightly twisted here, so make sure before grafting that they are in the order specified by row 1 of the pattern.
Holding up the two needles, they should be facing the same way without twisting the brim. Turn them so that the brim forms a loop with the wrong side facing out.
You'll need to graft the stitches as they lie, using knit grafting (kg) for the knit stitches and purl grafting (pg) for the purls. Or, in other words, kg 4 times, pg 6 times, kg twice, pg 6 times, kg twice, pg twice.
Body
Picking up
Hold the looped brim so that the k2, p2 rib is at the top and the p4 stockingette is at the bottom. Pick up one stitch per row around the brim. Because the body is knit on larger needles, there is no need to adjust for gauge.
Knitting the body
Count the picked up stitches. If you didn't miss any rows, you should have a multiple of 16 stitches, plus one. Find the nearest multiple of 16. If it is greater than your number of stitches, you'll be increasing. If it is less than the current number of stitches, you'll need to decrease.
Mark the beginning of the round.
Using the 6 mm needles, knit one round in p2, k2 rib. If you need to increase, knit, evenly around the round, kfb, p2. If you need to decrease, knit k2tog, k1, p2 evenly spaced around the body of the hat.
Knit the following pattern:
- p2, k2, p2, k2, p2, k2, p2, k2
- p2, k2, p2, k2, p2, k2, p2, k2
- p2, c2l, c2r, p2, c2l, c2r
- p3, c2x2l, p4, c2x2r, p1
- p3, k4, p4, k4, p1
- p3, c2x2l, p4, c2x2r, p1
- p3, k4, p4, k4, p1
- p2, c2r, c2l, p2, c2r, c2l
- p2, k2, p2, k2, p2, k2, p2, k2
Do not knit the last two stitches of this round. Instead, move your round marker back two stitches. This is the new beginning of the round.
- c2l, c2r, p2, c2l, c2r, p2
- p1, c2x2r, p4, c2x2l, p3
- p1, k4, p4, k4, p3
- p1, c2x2r, p4, c2x2l, p3
- p1, k4, p4, k4, p3
These two rounds make a 4-stitch-wide twist in the columns of 4 knit stitches.
- c2r, c2l, p2, c2r, c2l, p2
Knit the first two stitches of the next round and move your round marker forward two stitches. This is the new beginning of the round.
- p2, k2, p2, k2, p2, k2, p2, k2
- p2, c2l, c2r, p2, c2l, c2r
- p3, c2x2l, p4, c2x2r, p1
- p3, k4, p4, k4, p1
- p3, c2x2l, p4, c2x2r, p1
Reducing
If you are knitting on circular needles, as you knit the following rounds, when the stitches become too tight, switch to double-pointed needles.
- p3, k2tog, k2, p4, k2, ssk, p1 (14 stitches per repeat)
- p2, s1, p1, psso, c2l, p2, c2r, p2tog (12 stitches/repeat)
- p2, s1, p1, psso, k2, p2, k2, p2tog (10 stitches/repeat)
- p3, c2l, c2r, p1
- s1, p1, psso, p2, c2x2r, p2tog (8 stitches/repeat)
- p3, k4, p1
- p3, c2x2r, p1
- p3, ssk, k2tog, p1 (6 stitches/repeat)
- s1, p1, psso, p1, k2tog, p1 (4 stitches/repeat)
- s1, p1, psso, p2tog (2 stitches/repeat)
Finishing
Cut the yarn and draw the tail through the stitches on your double-pointed needles. Pull it tight, knot it and weave it in.
The bottom of the brim is 4 rows of purl stitches and likely rolls in on itself. Taking a tapestry needle and yarn of the same colour as the brim, sew the selvedge to the uppermost row of purl stitches.
Chart
Brim

Body

Here's a nice simple hat pattern that popped into my head as I was re-knitting the knotwork hat.
Cast on enough stitches (a multiple of 4) on a circular needle to go loosely around the head. Join in the round and mark your starting point.
- Knit one round of k2, p2 rib.
- Cable two left (place two stitches on a cable needle, purl one stitch, knit two stitches off of the cable needle), purl one, repeat.
At the end of the round, move your starting point forward one stitch.
When the hat fits from ears to the top of the head, begin decreasing on the purl stitches. As before, after every cable row, move your round marker forward one stitch.
Essentially,ssk the last knit stitch of every fourth rib together with the following purl stitch. Cable the next round, then ssk on the cable before the decreased one, cable again.

The chart shows four cables; the parts in purple are repeats of the pattern. Rounds 1 and 2 should be repeated until the hat is tall enough, as described above.
These decreases should spiral around to the middle, where they meet.
After you're done decreasing, pass the yarn through the remaining stitches and pull tight.
By round 20 of the hat body, I'd made four mistakes. The biggest was that I'd cabled one of the twists left then right, but I'd also lost a stitch, realised that I wanted to alter the pattern at round 5, and didn't like how the knitted join between brim and body looked.
Solution: Rip 20, start over. I am, however, liking the feel of the second attempt more than the first, but this brings the false-start tally on this project to:
- 5 attempts at knitting a nice cable pattern for the brim.
- 2 test knits for the body pattern.
- 1 nearly-complete body ripped out.
So, the brim to this hat is done; 60 cm of dense cabling. That led me to a technique that I knew I was going to have to use. Namely, grafting.
Knowing that, I turned to Google, which gave me the helpful entry on nonaKnits blog However, there was a catch: that and every tutorial I could find that made sense to me wanted to talk about stockingette. My fabric is p4, k6, p2, k6, p2, k2.
So I thought a bit. Then I forged ahead, full of hubris. And, to be blunt, I fucked up. After the fact, it occured to me that, on a project that, to date, has had six test swatches knit to get the cable patterns right, I could have spared the ten minutes to knit two pieces of stockingette-plus-ribbing to screw around with. Especially since I know better than to carry out experiments in a production environment.
That said, I learned a lot from my mistakes:
- Always, always, always swatch.
- Kitchener stitch has four actions for each stitch.
- If the yarn goes to the middle, that's a knit. If it goes to the outside, that's a purl.
- It's easiest to start on a knit stitch.
- Grafted stitches are nearly impossible to pull out.
- Always swatch, you fool.
So, that said, I now see the geometry of the two basic stitches and I'm writing it down so that next time, I don't dig myself a hole.
To start, have all stitches live and on two needles with the tips facing left as you hold them in front of you. Have a tail of yarn at least 3 times the length of the edges that you're about to graft together.
If the right side starts with a purl stitch, turn the work inside out, so that you're starting on a wrong side knit stitch.
Knit Stitch
- Pass the yarn knitwise through the first stitch on the needle nearest you. Since it is going toward the middle, it's a knit stitch.
Drop the stitch off the needle.
- Pass the yarn purlwise through the next stitch on the needle nearest you.
Leave this stitch on the needle.
- Pass the yarn purlwise through the first stitch on the farther needle. Since it is again going toward the middle, it's a knit stitch.
Drop the stitch off the needle.
- Finally, pass the yarn knitwise through the next stitch on the farther needle.
Leave this stitch on the needle.
Repeat those four steps for every knit stitch, even if the next is a purl. I count them in my head as 'in, out, in, out'
Purl Stitch
Unsurprisingly, the purl is simply the inverse of the knit.
- Pass the yarn purlwise through the first stitch on the needle nearest you. Since it is going away from the middle, it's a purl stitch.
Drop the stitch off the needle.
- Pass the yarn knitwise through the next stitch on the needle nearest you.
Leave this stitch on the needle.
- Pass the yarn knitwise through the first stitch on the farther needle. Since it is again going toward the outside, it's a knit stitch.
Drop the stitch off the needle.
- Finally, pass the yarn purlwise through the next stitch on the farther needle.
Leave this stitch on the needle.

In the case of this hat, I'm going to suck it up, live with my mistakes and carry on. Fortunately, the next step in this project is far less arduous: picking up one stitch per row of ribbing from a knit selvedge.
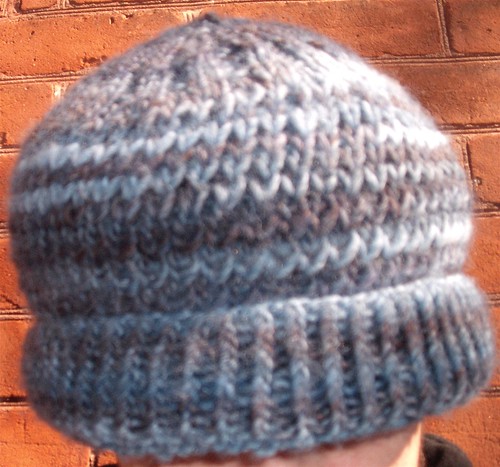
 I'm knitting, flat, the brim of a hat which will eventually be joined together and picked up. This is the chart that I'm following, a paired three-strand braid. The left side will be picked up and be knitted with a further knotwork pattern. The right side will be folded over and sewn together, to make a rolled border.


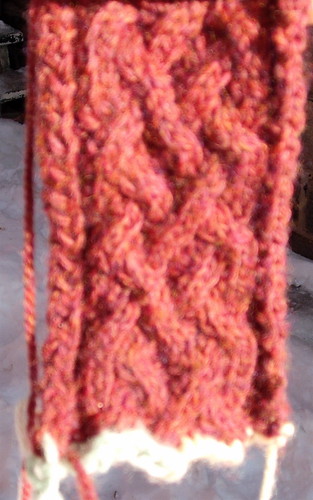
I've just finished knitting this hat, with a cable pattern of stylised trees. The trees themselves are based on a binary tree structure, but have twists and knots around themselves and around other branches. The way the branches converge into a cluster reminded me of groves of dogwood, hence the name.
The trunk expands (via a pair of decreases and increases), then splits into two branches. These branches twine once around themselves then split again, the four split branches twining before dividing yet again into a meshwork of twisting branches that stretch to the top of the hat.
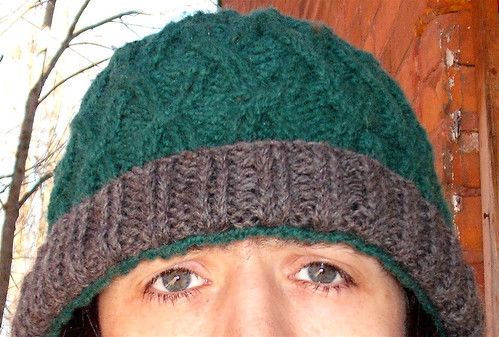 Here is the travelling cable hat after I got done adding eight rounds of k2p2 rib to it. It's warmer, especially around the ears.
I've worn the Joy of Cables Hat for a few days now, and am finding that my fear of running out of yarn made for a hat that was a little too shallow. It just covers my ears and does so loosely.
Fortunately, I have plenty of yarn in other colours, so I'm going to extend the hat by 5cm or so. The edge is a simple k2p2 rib, so what I'll do is pick up stitches, purl one row to give the hat a line where it'll fold easily, then knit a brim in the same rib.
Because I'm trying to tighten the hat a bit as well, I'll keep the rib the same. Were it already a snug fit, I'd increase on rows 4 and 8, in the purl part of the ribbing.
The hat was knit on 5mm needles, so I'll pick up with much smaller needles. The closest smallercircular needles at hand were 3.5mm, so I'm using those. Picking up stitches is a simple enough prospect: there's a hole just right of each stitch, so I insert a needle under both threads of the cast on, insert the point of my circular needle and knit a stitch. Then I repeat that 120 times, one per stitch.
After that, I'll knit from the 3.5mm needles onto 6mm ones, as that was the size used for the hat.

This is a pattern for a hat that just popped into my head. I thought it would be neat to use cables in a spiral pattern, so that half the cables turned right and the other half turned left. As I was knitting it, I added a few more things, like the cables being woven into an over/under/over basketweave.
The hat is surprisingly soft and warm (I knit it from heavy worsted weight wool) and, because it is, in essence, a k2 p2 rib all the way around, it has a good amount of give to it.
The pattern has cabling on three rounds of every eight, but it repeats often enough that it's elatively simple to keep in your head.
Requirements:
- Double-pointed needles (I used 5mm DPNs)
- Optionally circular needles in the same gauge.
- 100 to 150 metres of worsted weight yarn.
I knit the hat with a gauge of 2 stitches / cm in k2p2 rib and 5 rounds / 2 cm, but the pattern adapts easily to different sizes by adding or removing repeats both around and vertically.
Cast on enough stitches on circular or double-pointed needles to go loosely around the head, with the number of stitches being a multiple of 8. The pattern repeats are 8 stitches long, with two cables being worked every 8 stitches.
Join in the round, then knit 2, purl 2 and mark that point as the start of your round. The pattern from here on will be expressed as a set of eight stitches. Repeat that as many times as needed to finish the round.
| Rows 1-12 | k2, p2, k2, p2 |
| Row 13 | Cable 2 left (c2l: Place two stitches on a cable needle or double-pointed needle, hold them in front of the work. Purl the third stitch then knit the two stitches off the cable needle.), cable 2 right (c2r: Place one stitch on another needle, holding it to the back of the work. Knit the next two then purl the stitch off of the cable needle), p2 |
| Row 14 | p1, cable 2x2 right (c2x2r: Place two stitches on a cable needle, holding it to the back of the work. Knit the next two then knit the stitches off of the cable needle), p3 |
| Row 15 | p1, k4, p3 |
| Row 16 | C2r, c2l, p2 |
At this point, every pair of cables has moved toward each other and crossed over, with the left cable going over the right.
| Rows 17-19 | k2, p2, k2, p2 |
| Row 20 | k2, p2, k2, p2 |
| Stop this round four stitches before the end and mark this point. There should be one column of ribbing left. For the next four rounds, this is the new beginning of the round. |
| Row 21 | c2l, c2r, p2 |
| Row 22 | p1, cable 2x2 left (c2x2l: Place two stitches on a cable needle, holding it to the front of the work. Knit the next two then knit the stitches off of the cable needle.), p3 |
| Row 23 | p1, k4, p3 |
| Row 24 | c2r, c2l, p2 |
| Row 25 | k2, p2, k2, p2 |
| At the end of this round, move the beginning of the round forward four stitches, so that it's back to where it was originally. |
| Rows 26-28 | k2, p2, k2, p2 |
| Row 29 | c2l, c2r, p2 |
| Row 30 | p1, c2x2r, p3 |
| Row 31 | p1, k4, p3 |
| Row 32 | c2r, c2l, p2 |
| Rows 33-35 | k2, p2, k2, p2 |
| Row 36 | k2, p2, k2, p2, marking 4 stitches before the end as the new beginning of the round. |
| Row 37 | c2l, c2r, p2 |
| Row 38 | p1, c2x2l, p3 |
This is where I chose to begin decreasing. If you want a deeper hat, continue the pattern, knitting rows 23-38 until the hat is as long as you want it and stopping on a row where you are either cabling 2x2 left or cabling 2x2 right.
For the decrease rows, the pattern repeats quicker and quicker as you go because the pattern is decreasing in size with every row. Row 1 repeats every 8 stitches, row 2 every 6, row 3 every 5, etc.
If you are using circular needles, when the hat becomes too tight on them, switch to double-pointed needles in the same size.
| Decrease row 1 | Slip slip knit (ssk: slip two stitches, inserting the right needle as if to knit them. Insert the left needle into the front loops of the slipped stitches, wrap the yarn around the right needle and draw it through the loops), knit two together (k2tog: insert the right needle through the front loops of the first two stitches on the left needle. Knit these stitches as if they were a single stitch), p4 |
| Decrease row 2 | SSK, p4 |
| Decrease row 3 | SSK, p3 |
| Decrease row 4 | SSK, p2 |
| Decrease row 5 | SSK, p1 |
| Decrease row 6 | SSK |
Repeat row 6 until you have fewer than ten stitches on your needles. Take the yarn and pull it through all of the remaining stitches before sliding them off the needle. Pull the yarn inside the hat and tug it tight.
|
|