


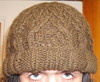


So, the brim to this hat is done; 60 cm of dense cabling. That led me to a technique that I knew I was going to have to use. Namely, grafting.
Knowing that, I turned to Google, which gave me the helpful entry on nonaKnits blog However, there was a catch: that and every tutorial I could find that made sense to me wanted to talk about stockingette. My fabric is p4, k6, p2, k6, p2, k2.
So I thought a bit. Then I forged ahead, full of hubris. And, to be blunt, I fucked up. After the fact, it occured to me that, on a project that, to date, has had six test swatches knit to get the cable patterns right, I could have spared the ten minutes to knit two pieces of stockingette-plus-ribbing to screw around with. Especially since I know better than to carry out experiments in a production environment.
That said, I learned a lot from my mistakes:
- Always, always, always swatch.
- Kitchener stitch has four actions for each stitch.
- If the yarn goes to the middle, that's a knit. If it goes to the outside, that's a purl.
- It's easiest to start on a knit stitch.
- Grafted stitches are nearly impossible to pull out.
- Always swatch, you fool.
So, that said, I now see the geometry of the two basic stitches and I'm writing it down so that next time, I don't dig myself a hole.
To start, have all stitches live and on two needles with the tips facing left as you hold them in front of you. Have a tail of yarn at least 3 times the length of the edges that you're about to graft together.
If the right side starts with a purl stitch, turn the work inside out, so that you're starting on a wrong side knit stitch.
Knit Stitch
- Pass the yarn knitwise through the first stitch on the needle nearest you. Since it is going toward the middle, it's a knit stitch.
Drop the stitch off the needle. - Pass the yarn purlwise through the next stitch on the needle nearest you.
Leave this stitch on the needle. - Pass the yarn purlwise through the first stitch on the farther needle. Since it is again going toward the middle, it's a knit stitch. Drop the stitch off the needle.
- Finally, pass the yarn knitwise through the next stitch on the farther needle.
Leave this stitch on the needle.
Purl Stitch
Unsurprisingly, the purl is simply the inverse of the knit.- Pass the yarn purlwise through the first stitch on the needle nearest you. Since it is going away from the middle, it's a purl stitch.
Drop the stitch off the needle. - Pass the yarn knitwise through the next stitch on the needle nearest you.
Leave this stitch on the needle. - Pass the yarn knitwise through the first stitch on the farther needle. Since it is again going toward the outside, it's a knit stitch. Drop the stitch off the needle.
- Finally, pass the yarn purlwise through the next stitch on the farther needle.
Leave this stitch on the needle.

In the case of this hat, I'm going to suck it up, live with my mistakes and carry on. Fortunately, the next step in this project is far less arduous: picking up one stitch per row of ribbing from a knit selvedge.
0 comments:
Post a Comment